Friday, July 31, 2015

ModeS Fabric Review ~ Reversable Tote/Crossbody Bag Tutorial


Are you familiar with ModeS? They are an online shop selling cute stationery, fabrics, bags, accessories and more. If you are a big fan of Kawaii products from Japan, you will love to visit their website.

I was contacted by them to review their fabrics and I was more than happy to jump in and enjoy this opportunity. The fabrics I chose are grey Daisy Chain flower Canvas fabric Framework and coral red corners angle geo Canvas fabric Framework by Kokka. One day, I had a happy mail day...

The nice blend of 85% Cotton/ 15% Linen is perfect for what I had in mind to make.

I wanted to design a bag for one of my sisters who rides a bike everywhere. I thought she would love a bag she could use as a cross body while she rides her bike, use it as a tote if she needs to get a small amount of groceries, or for going to the library to borrow a few books. Psst... and get this, to add more versatility I designed this bag to be reversible, so she can enjoy both sides!

{You will need}


Fabric A and B --- 3/4 yard each(44"/45" wide)
Heavy weight fusible interfacing --- for the handles and the strap
Fusible fleece (I like Pellon 987f) --- for the body
Matching thread
1 1/4" D-rings --- 4
Swivel hooks --- 2

{How to}

1. Cut fabrics according to the picture. From fabric A you need to cut 2 body pieces, 2 handles, 1 trim fabric, 2 tabs, 1 pocket, 1 strap. Then from fabric B you need to cut the same parts as you did with fabric A. To make this reversible design work, you will need to switch a few parts between fabric A and B as you make progress in sewing this bag.

2. Fold the trim piece in half horizontally, press with iron. Open it up, bring both seams to the folded line in the middle as you press with an iron. Sew them on to the top seam of the pocket. Make sure to mix and match the two fabrics.

3. Fold the 2" side of the seams of the tab by 3/8" press with iron and fold it in half. Sew.

4. Cut 2 strips of 1" x 16" from fusible interfacing. Read the manufacture's instruction and Fuse them onto the middle of the wrong side of the handle of fabric.

5. Mix and match the handle of fabrics A and B. Put them right sides together and sew along the side of the edge of the interfacing. Leave both ends open for turning the fabric inside out.

6. Cut the excess to make the seam smaller. This makes it easier to turn the handle inside out.

7. Press the handle with an iron. Top stitch both sides 1/8" from the edge.

8. Cut the Cut strips of 1" x width of the strap from fusible interfacing. Repeat steps 3 to 6 and make the strap. Sew both ends with swivel hooks and set the finished strap aside.

9. Cut 16" x 17" rectangle from the fusible fleece. Fuse them onto the wrong sides of body pieces from one of each fabric A and B. You might ask why not the same fabric set... because this bag will be reversible and each (A side and B side) will have its own pocket. To sew the pocket, I wanted a stronger body to stabilize the pocket better. That is why we need to fuse the fleece to one of each fabric.

10. Pin the pocket onto the fused body pieces. Measure 6" from both sides of the pocket, draw lines and sew on top of the line to separate the pocket. With large stitches sew the pocket to the body to keep them together better. Sew very close to the edge. Now you have a body piece with a pocket.

11. Take the same fabric but without the pocket and put them together with right sides of the fabric and pin the sides and the bottom. Fold the tabs you made during step 2, fold in half with a D-ring. Remember, if you are working on fabric A, you want to use tabs made out of fabric B so you can create a contrasting design. Measure 5" from the top edge of the body and slide in the tabs just blow the 5" lines so you can sew them in on the side of the bag. Sew with 1/2" seam.

12. To make the boxed bottom. Pinch the bottom and side seam together. Make sure the seams line up perfectly. Pin and measure 3" (1 1/2" from each side of the center line) and draw a line and sew. Cut off the excess. Do the same to the other side. You can also find how to on my She Carries Flowers tutorial

13. When you turn the body inside out, it will look like the picture below. Work on the other set of the body pieces as well.

14. Put both body pieces right sides together. Make sure that side seams line up perfectly and pin. Measure 4 1/2" from both sides and slide in the handles between the right side of the fabrics A and B. Make sure that the handle fabric will contrast the body fabric. Mixing and Matching is happening here as well. Leaving the opening, sew all the way around.

15. Turn the body inside out. Press the seam with an iron. Top stitch the edge of the opening of the bag.

16. Hook the strap you made on step 7 to the side of the bag you want to use. Now the bag is ready to be used!

Side A or...

Side B, which one do you like the best?

When you are using one side of the fabric, you still get pockets inside of the bag as well. Total of 6 pockets!

Before I send this bag (or "these" bags?? because you can use it in so many ways!), I needed to test it.

You can fold the top when you don't have much to carry

I like this side too

Do you want to head over to ModeS to see their large selection of fabrics and see what kind of fabric combinations you can come up with? Thank you for stopping by, I hope you enjoyed the tutorial! :)


Thursday, July 30, 2015

Pinterest Baking Day

Do you collect lots and lots of recipes on your pinterest board? I do. Do you actually go back and make them?... My answer to that is not really.
I woke up one morning and really wanted to try out some of the recipes from my pinterest board. I decided to bake a couple of my newest pins.

This key lime pie recipe is by Mom on Time Out it was super easy to make and delicious. Personally I could do with less sweetness, but everyone who had this loved it.
My wonderful neighbor gave us the zucchini from their garden. That inspired me to bake this bread. Ohh...it was so heavenly. The recipe was by Sally's Baking Addiction and as she said in the recipe, you need to serve the bread when it is cool. It is so much better and moist. Everyone loved it!

It is so discouraging to try a new recipe and it doesn't turn out as good as you thought it would. This time, the result was the opposite. Both recipes were so good, I will be making them in the near future again. :)

Monday, July 27, 2015

Review ~ the Shirt Making Workbook

If there is such a thing as a bible for shirt making, this book would be it.

I was given the chance to review the book, "the Shirt Making Workbook" written by David Page Coffin who was an editor at Threads magazine as well as contributing many articals for them. David has taught and lectured all over the U.S, Canada, and U.K. He has also taught an online class for Craftsy.com.

What I love is that David did an amazing job explaining things so well throughout the book.

Yes, I can sew a garment... well, as long as it's not too complicated. I have never attended a sewing school, I have learned everything I know through trial and error. I know I still have a lot to learn. I hope my book review can give you the glimpse of how awesome this book is and how great it is for everyone; beginner to intermediate!

In chapter 1, he talks about where and how to get these five basic blocks(patterns). In the last chapters (3 through 7) teaches us details and specialized techniques associated with each of five block types in the picture in the bottom.

In Chapter 2, you can learn and review a few key generic construction techniques in common use among professionals.

Who knew there are so many different collar types!

There are some unique pocket and cuff ideas too!

He also featured some designers in his book. My most favorite designer is Morgan Meredith. Morgan and her husband Matt has a pattern line for menswear. You need to go check out their website for the unique and versatile patterns, tutorials and links. It is hard to find stylish and current menswear patterns. As my boys are getting older, I am happy to know that I have a go to pattern store with one click of a button.

Reading through the book I realized that this is not a sewing how-to book even though he shared many great techniques through out the book. This is a shirt design book which is full of information that professionals would use with a more friendly approach for home sewers like myself. Also, what's great about this book is that this workbook provides a large collection of full-size add-on detail patterns in digital, printable format. Now, we can really get rolling and have fun with it!

Intrigued? If you want to expand your knowledge in shirt making, you don't want to miss this one. I highly recommend it! :)


Thursday, July 23, 2015

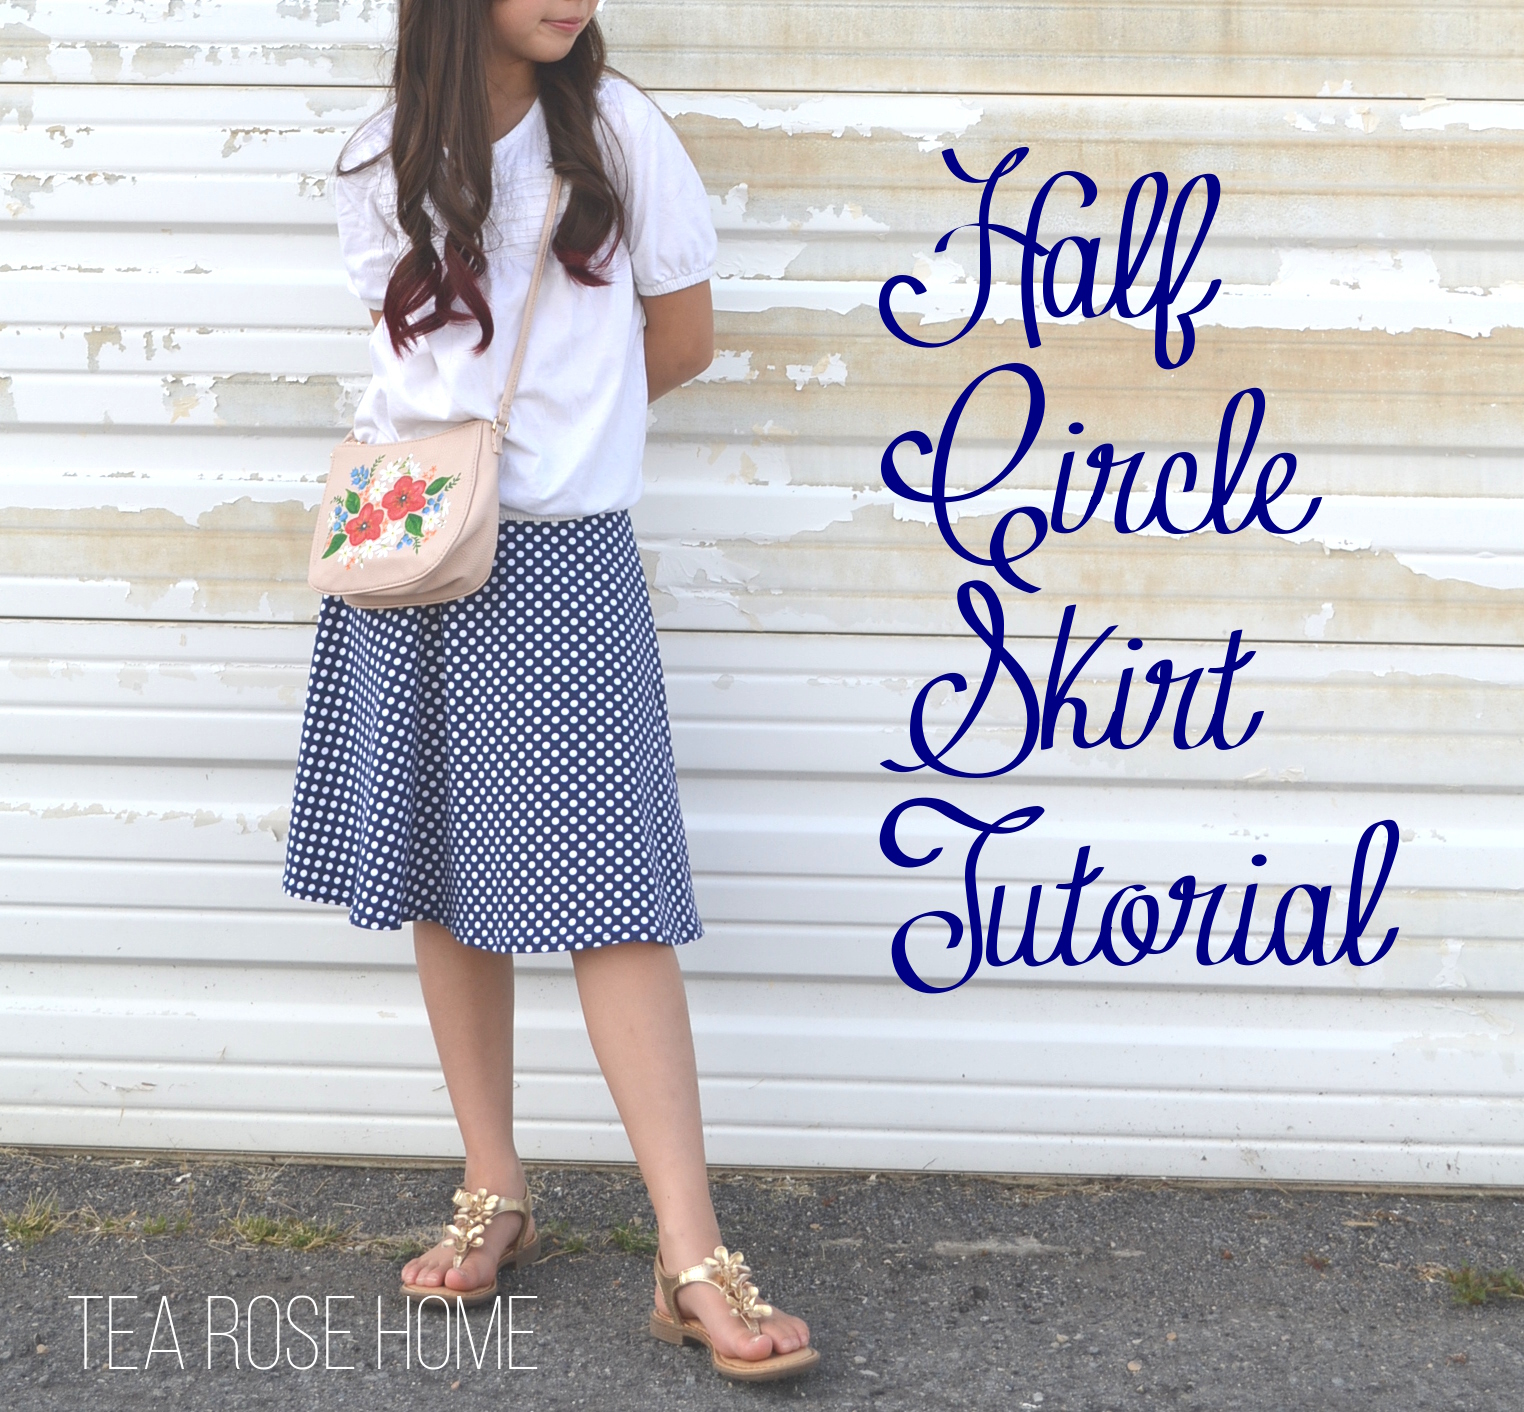
Tutorial~ Half Circle Skirt {Skirting the Issue}

Hello everyone, I am participating in "skirting the issue" blog hop today! What is skirting the issue? It is a month long event where you are invited to sew along with Liz and Elizabeth of Simple Simon & Co and other participant bloggers to sew skirts to donate to local Foster Care centers. They have a goal of 1000 skirts to donate this year, so that the girls in the foster care have new skirt to wear on the first day of school.

I am sharing the tutorial how to make a half circle skirt today with knit fabric. The half circle skirt is one of my most favorite styles, because it still has a look of full circle but less drama and actually stays with your body lines better (full circle skirts tend to blow up more with the wind!). It is a perfect mix of prettiness + functionality which is perfect for school! There are a couple things before we begin.

{Fear of Knit fabric}

I know, I have been there. You don't have a serger? Not to worry, you can still sew with knits if you know some tricks to work with them. I wrote a tutorial on how to sew a knit skirt with tricks you need to know a while ago, please head over to the post and see what kind of needle and working foot you need to use.

{Drafting a Half Circle Skirt}

It is a lot simpler than you think. Once you know how, you can customize a half circle skirt for anybody! There are many great tutorials in blog land, but some are harder to understand than others. Here is a very simple explanation of how I figured out the numbers to customize a half circle skirt for my daughter.

1. Measured her waist.

2. Take the measurement and do a little math problem.

Waist ÷ 3.14 = inner circle radius

My daughter's waist was 23", so I did 23 ÷ 3.14 = 7.324.... round the number. I decided to go with 7 1/4".

3. Start drafting the pattern. I used my measurement, but when you are drafting a pattern you can use your number that you figured out for the inner circle and apply the number that you like for the length of the skirt. Remember, when you are figuring out the length, don't forget to include the number of the highs of the belt.

{Talk about Seam}
In this pattern I use 3/8" seam for all except the bottom seam of the skirt. I know this is much narrower seam compared to commercial patterns, but since I wasn't sewing with a serger I did't need a wide seam allowance. Also I don't care for wide bulky seams on my clothes. This is a personal preference, so you can change it to whatever width you like. :)

Ok, the rest is easy-peasy!


{What you need}

58/59 Wide Mid weight knit fabric ------ 3/4 yard (I used the knit from Riley Blake Designs they are easy to work with and very nice quality). My daughter is 9 years old, if you are making this for older girls, you will need more yardage.

3/4" Wide Non Roll Elastic ---- waist length + 1"

Matching Thread

{How to}

1. Fold the fabric in half in the middle and lay down the pattern you created on it. Make sure that one side of the pattern seam matches perfectly with the folded seam. Pin and cut.

2. Cut 1 strip of fabric 2 1/2" Wide x the length of the waist + 3/4" seam allowance.

3. Fold the half circle fabric right side together. Match the seam perfectly and sew with 3/8" seam. Then treat the edge with your preferred stitches. Fold the seam towards one side and press with iron.

4. Bring both ends of the waist bands right sides together. Leaving a small opening for the elastic to go through later and sew.

5. Open the seam and press with iron. Then, fold the waist band in half horizontally. Match the top edge of the skirt and the edge of the folded waist band and pin. Make sure that the seam of the skirt and waist band match perfectly in the back and the opening for the elastic will show in inside of the the skirt.

6. Sew all around it and treat the edge as well. fold the seam toward the skirt and press with iron.

7. Top stitch to secure the seam and give a finished look.

8. Fold the bottom seam by 1/2" and sew with double needle to finished it up.

I knew the polka dot navy skirt would be so cute and versatile same with the gray polka dot as well. Because it was so easy and fairly inexpensive to make, I made two to add to her wardrobe.

Time for a test run... I hope she likes it!


You can find many free skirt tutorials at Simple Simon & Co. Visit them and discover lots of other participant bloggers! :)

Monday, July 13, 2015

Orange Peel Quilt


The busyness of summer is a bit different than the busyness of the school year. I still drive my kids to activities and to play dates all on top of the places I want to take them. Sometimes it crosses my mind "How many more summers do I have where I have all my kids with me?". Therefore I have been out a lot or even when I am home, my time is consisting of activities with kids. I manage to squeeze some time to sew still, and I just finished with this orange peel quilt I started last fall.


Our family vacation is coming up and I have so much to do before we leave, but I just wanted to drop in to say "hi" and share my quilt. :)

Oh! Update about my van... we talked to the dealership and we are still seeking the best option. I just wanted to tell you how much I appreciate your comments and emails about the accident and I will let you know when I have more to tell. :)

I hope the summer is good to you and your life is filled with happiness and laughter.

Love

Sachiko

Monday, July 6, 2015

Screech- Bang! ... and Much More

I have written about one of life's curve balls in the past; this post is one of them... as you can see in the picture, that's what happened to my minivan last Monday.

I took my car in for an oil change. I take mine in to the car dealership where we bought our car brand new almost 5 years ago. Even though I made an appointment for the oil change, there were so many cars in the garage. So I talked to a person who works there, did the paperwork and signed my name and headed in to waiting area. I found a spot and sat down and started to read. After a short while, I heard,

SCREECH, BANG!!!!!


Everyone in the waiting area looked up, including myself. "That didn't sound good" I thought.

Many people stood up and headed to the garage to see what happened. I also saw many people come from the sales area and from upstairs to go see what had happened. I sat and waited for a while.

As some people came back they were saying that "Man, that didn't look good." or "Boy, I feel bad for the owner..."

I thought "ok, maybe I will go check this out myself too" then I stood up and walked to the garage. There is a large glass window where you can see the whole garage. As I was getting closer to it, I saw a white minivan and a truck unnaturally close to each other.

NOTE: Does this happen to you? In your mind you can see things and be able to process what might have happened but you are in denial and try to direct your thoughts to somewhere else? Basically that was happening in my head. Ok, you can keep on reading...

I thought well, this is a Toyota dealership, of course there are gonna be other white minivans just like mine. That's not mine.

I got closer... then I saw a rectangle blue handicap sign hanging in the middle of the front windshield. Ugh... That moment, I knew, that minivan is mine. I kept the same pace and got closer to my van and saw some damage even from behind. My van was rammed into the truck that was in front of it. When they backed out my van it made a horrible sound and revealed its damage. My jaw dropped and for a moment I could only stare at it blankly, but I took a picture and sent it to my husband with short message that said "Look at what happened to my van".

He was on his way, but in the meanwhile my head was filled with our schedule for the next few weeks. The thing is, I can't drive any other car except ours. Because I have prosthetic limb on the right leg, I have a special pedal installed in my van so I can drive with my left leg. Mr. TRH's sedan has the same pedal and I can drive it, but we bought the minivan to meet our family's needs. (I did by the way, tell them that there was a left foot accelerator that can be easily removed and to be careful.)

My boys are doing a lawn mowing business for the summer and I was helping them out to haul the lawnmower... they need to call their customers and tell them what happened...

While all this (and more) was going through my mind, many people in the garage came up to me and said "sorry this happened" or "make sure that they (the dealership) will take good care of you", trying to comfort me. I really appreciate those gestures but the storm in my head was still there and I started to tear up. Then, an older couple approached me. They were the owners of the truck that was hit by my van. Instead of being angry, they were so nice and sweet and they both tried to comfort me. We walked to the waiting area (the woman got me a tissue as well) and sat and started to talk to each other while we were waiting to talk to the dealer.

We met under bad circumstance, but as we talked to each other we found we have lots of common ground and had a very nice visit. I didn't ask their number or anything, but I really appreciated the time we spent together and their kindness to me.

So, after three hours of waiting... we were able to sit and talked to the people at the dealership. They told me that what happened was that person who drove my car was just going to shimmy the car forward while riding the brake. He accidently stepped on both the left foot accelerator and brake at the same time and the car launched forward. I always warn them about the special pedal, if you are not used to it, that could happen... it was a total accident. I am grateful that nobody got hurt because of this, it would been terrible if that was the case.

Well, a week later we still don't know what is going to happen. I think they are trying to figure out what they can do with their insurance company and all. The thing is that we bought the car brand new at the end of 2010 (it's a 2011 model) and paid it off shortly after. Our plan was to drive that van for a long time, at least until our youngest is out of the house. We were not expecting to have any car payments for years except for regular maintenance.

What is the most likely scenario for something like this? Does anybody know?

Phew... talk about a curve ball... I am just hoping and praying that things will work out ok. Hopefully I can write a good follow up post soon. :)


Blog Widget by LinkWithin