Hi everyone! Amber of the amazing blog, Crazy Little Projects, is doing a fun sewing challenge every month. This month's theme is "Gift items". I was so excited to be asked to be a part of it and to share my project today!
Halloween is behind us and Thanksgiving is approaching. Is your home all decorated for fall? I love decorating my house with some things appropriate to the season. I thought it would be fun to make a decorative pillow with a bunch of leaves with a little splash of jewel color.
That. is. not. all. I created this pillow on a small budget. You might want to make several to give out to your family, friends, Thanksgiving dinner host, and even to yourself. Isn't it one of our dramas as a sewer/crafter that the cost of materials add up! If you were looking for something nice to make on a tight budget, this might be what you are looking for. :)
{You will need}--- and some tips, please read before you head out to shop
Felt --- They were having 4 for $1 sale when I bought them. I needed 10 felts (4 silver gray and one of each colors) which was only $2.50! They usually cost a little more. Since you only need about half the felt for each color for the leaves, if you decide to make two pillows, you can make each one for slightly less. You will need the colors below.
Gold, Golden rod, orange, coral red, olive, aqua, Silver Gray
The color of the thread you want to use --- I used dull orange colored thread from start to finish. If you don't want the color to pop against the gray felt, it is totally fine to use a different color.
1 3/4 yards of Pom-pom --- this can make the cost go up, but Jo-Ann Fabric always has coupons. Look for a 40% or 50% off coupon!
Fiber fill
{How to}
1. Cut 2 pieces of silver gray felt the long way. Now you have 4 pieces of 4 1/2" x 12" pieces.
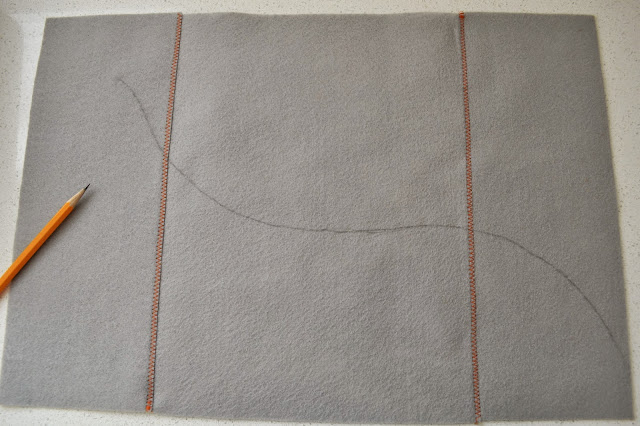
2. Sew them on to the sides of the whole felt. Over wrap 1/4" on the seam and sew with zig-zag stitch. Do the same with the other pieces. Now you have 2 pieces of 12" x 17 1/2" silver gray felt.


4. Trace them onto the felt. You need 22 leaves total. You can mix and match however you want.
5 Draw a nice wavy line. This will be a guide line for the placement for the leaves.
6. Pin the first leaf and sew then move on to the second leaf. Repeat the process until the leaves reach to near the end of the line.
7. Lay the back and the top felt together. Starting at the middle of the bottom, pin the pom-pom trim all around the pillow.
8. Switch the presser foot to Zipper foot on your machine. leaving 4" to 5" opening in the bottom, sew all around the pillow.
9. Stuff the pillow with fiber fill. Pin the rest of the pom-poms, front and back felt together. Sew the opening shut with your preferred method.
Now, you have a leafy felt pillow to give or to cozy up part of your house.
I hope you enjoyed my tutorial. :)
Happy fall!


Super cute pillow! Thanks for sharing your tutorial!
ReplyDeleteThe pillow is beautiful and the autumnal colors have such a warm feeling!
ReplyDeleteGorgeous!! and very cool how you pieced the felt rectangles to make a larger pillow. I've got a Craft Gossip post that links to your tutorial here:
ReplyDeletehttp://sewing.craftgossip.com/tutorial-falling-leaves-felt-pillow/2014/11/04/
--Anne
LOVE IT! Thanks for the tutorial. :) I love fall, leaves, and those colors! Putting this on my list.
ReplyDelete