My favorites are her Tile Pendants and Anthro-Inspired Striped Ruffle Tee.
Head over and check out her fun blog!
Ok Courtney, take it away!
I'm so excited to be here over at Tea Rose Home today! Sachiko's blog is one of my favorites and it's also one of the very first blogs I started following back when I entered "blogland." I love all of her beautiful creations-her Ruffle Tee was the first tutorial I tried! I still get compliments on that shirt all the time!
In case you're wondering who this girl is rambling on and on, I'm Courtney from Scraps and Scribbles. I'm a SAHM to one busy 2-year-old boy. I've been married to my wonderful husband for just over 5 years. We live in sunny Florida, and love it. When I'm not spending time with my son or taking care of the typical housewife things like cleaning and the laundry, I like to craft, sew, cook/bake and take pictures. I have a little Etsy shop that I run with my sister-in-law were we sell our pretty creations. It's full of fun vintage finds and pretty jewelery to dress up your outfits. I love fashion and make-up and sharing what I find. If you'd like to know more about me, you can check out the About Me page over at my blog.
Today I'm sharing a simple way to disguise a holey tee. I'm still a novice seamstress, so when it comes to me and sewing, simple is best.
I had a little bit of a mystery-a bunch of almost new tees were developing holes in them, all near the bottom of the shirt, thus ruining otherwise perfectly good shirts. Not only was it frustrating because I didn't know what was causing the holes, but I felt like I was wasting money because these shirts that had only been worn 2 or 3 times were now trashed.
This is only about half of the pile of shirts with holes. I needed to come up with a creative way to cover up the holes without it being obvious that I was hiding something.
With the purple tee (which is also right there on the top), the holes were kind of big and covered a wider area
They were also a little off-center, so it presented a bigger challenge.
To fix yours up, you'll need:
A holey tee
A tee to cut up in a matching/coordinating color
matching thread
rotary mat, cutter and ruler
tailor's chalk
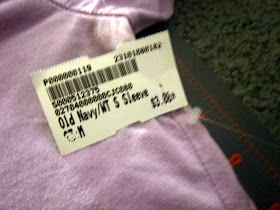
Then I found this tee at a consignment shop and had an idea. It matched the contrast stitching on the purple holey tee perfectly.
It was only $3! And HUGE! I've never seen such a large medium-sized tee! But that meant there was plenty of fabric to work with.
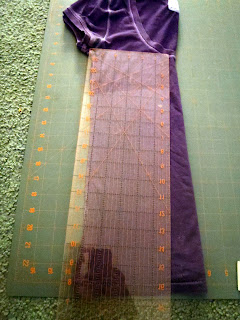
To start off with, I folded the dark purple tee in half and with tailor's chalk, marked a line diagonally down from the collar to just past the last hole at the bottom.
I pulled it out flat like this, still keeping it folded in half (see the chalk line) so that the area I cut out would be even. Then I cut out that chunk-bye-bye holes!
I measured the length of the piece I cut out and the width at the bottom and cut a piece out using those measurements from the lavender tee.
I wanted it to have a gathered look at the top, so I stitched some thread in about 1/4 in. down from the top of the edge and gathered it by pulling on the thread.
Then, using the piece I had cut out of the purple tee as a guide, I trimmed up the lavender piece
Then pinned it in place.
And sewed the pieces together.
Like so.
Now, you could stop here if you wanted. But I felt it needed a little something more.
Rosettes make everything prettier! I cut a few strips of fabric from the lavender tee and rolled them into rosettes, stitching them in place as I went so they wouldn't come undone.
Then attached them to my tee at the collar.
And there you have it!
Holes? What holes?
I'm quite pleased with how it turned out and I hope you love yours too!
Thanks so much for letting me "come over" today Sachiko! I hope you all come by Scraps and Scribbles and say hi! I'd love to meet you!
Wow, isn't that awesome project? Thank you Courtney for visiting us today!


I loved the project...thanks ladies for sharing...hope to have the courage and time to give a try...cheers, nadya
ReplyDeleteClever idea! It looks great!
ReplyDeleteI know what's causing those holes because I have the same problem! It's from your shirt rubbing on the button of your jeans! It happens to me all the time. Way to come up with a cute solution.
ReplyDeleteI get those little holes too! I think it's from the buttons on my jeans. Thanks for a lovely solution!
ReplyDeleteOh My! You get those holes also? I never knew why I was getting them and it was really frustrating. Plus it was ruining some of my favorite tees!
ReplyDeleteI found out that I lean on the edge of my sink when I wash the dishes and the shirt rubs against the metal button or rivet on the waist of my jeans (like the others mentioned) and there you have it! It rubs a hole right into the fabric! It only does this when I do the dishes....I guess I should stop right? hee hee!
Have you figured out how you get yours?
Great idea by the way! I must get sewing to fix mine.
Very cute!
ReplyDeleteOk. I get those holes lately too. Only, I've been doing dishes and wearing jeans for years and never had this problem before a couple of years ago. Is it a change in the type of knits they are using? What gives??? It's sooooo frustrating to spend money on a shirt an only wear it twice before it gets a hole. It's like buying disposable clothing. Arggggh. Love your solution.
ReplyDeleteall my shirts get those little holes, does anyone know what causes them?
ReplyDeleteThat's really cute! Love the refashion! I'm sure I have a few shirts that could use a lovely makeover like that. Thanks for sharing!
ReplyDeletei have the SAME PROBLEM!! right down at the center bottom...little tiny holes appear after only a couple of wearings. grrr--soooo frustrating! i noticed it happens a lot to my Old Navy shirts.
ReplyDeletethanks for the great fix idea! i was just tossing my shirts into the scrap/refashion pile--never occured to me that i could save them!!!