I wanted to make a light and versatile top using gauze for a while. Also, at the same time, I wanted to add texture and a unique element to it. After thinking about it for a while, I decided to use my Baby Lock Sashiko and experiment with it. I bought 1 yard of gauze at Joann’s and used Madeira premium quilting thread for this project. I made a very simple pull over top; no buttons, no zipper, no fuss. Also, I usually wear XS or S, so for this project 1 yard was enough. If you have a sewing pattern you want to use it may require more fabric or you are blessed in stature, you will need to adjust the amount of the fabric you buy. Let me share what I did to make this top.
*You will Need
1 yard of gauze (as I mentioned in the beginning, adjust this according to the design or your size)
Good quality thread
T-shirt or knit you love and want to use as a template
*How to
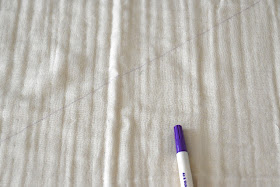
1. I prewashed the fabric first just in case of shrinkage and then I lightly ironed it. There is a great blog post on prewashing at Seamwork, if you are interested. Then,I trimmed the top and the bottom of the fabric to make it into a nice rectangle. I drew a diagonal line from one corner to the other corner. This is the first line you stitch on. After that I attached my quilting guide to determine where to sew next. I set it so that there would be a 1 1/4" width between the lines. It is a simple tool, but it's such a time saver when you don't have to draw each line by hand.
2. Start stitching with the Sashiko machine. It is a very different machine compared to a regular sewing machine, and it might be a bit intimidating, but once you get used to it, it is such a fun machine to play with to explore and expand your possibilities. A bit of advice I can give you from my experience is to use quality thread and keep a slow and steady speed.
3. Once you are done with stitching the whole fabric with diagonal lines going the same direction, draw another starting line in the middle from opposite corner to corner. This way, once you are done stitching, you will have a criss cross design.
4.I used a French sleeve sweater as a template. The textured fabric I created is not stretchable like a knit or sweater, so make sure to use an oversized t-shirt or sweater as a template; unless you are making a shirt with buttons or zippers. Otherwise you might not be able to pull it over your body.
Make sure to add 1/4" to 1/2" seam allowance when you cut.
5. Because the fabric will not stretch, I cut the bottom wider than the actual sweater.
6. I cut the bottom of the front panel shorter than the back, but this is totally personal preference.
7. Cut around the neckline.
8. Sew the shoulders, then I used my serger to treat the edge to keep it from fraying. You could use different stitches from your sewing machine if you don't have a serger.
9.Use the serger on the side of the fabric, from one end all the way to the other end. Mark where you want to sew on the sides. I used the sweater as a guide to where I wanted to start sewing under the armpit towards the bottom. I didn't want to sew all the way to the bottom, So I marked a few inches from the bottom as a stopping point.
10.Sew the sides, open the seam and press with an iron.
11. Sew the seam around the armhole and stitch down.
12. Press the seam around the bottom and stitch it down.
Front view...
13.I cut 1 1/4" strips to make bias tape and sergered one side and sewed the other side to the neck line.
Done!
This is just an example of what you can do with textured fabric. The possibilities are endless and I think it will be fun to make a light Jacket for fall.
Time to test drive this new top!


Wow! It looks gorgeous on you! I admire your ability to cut a pattern from an existing garment and making it look SO good!
ReplyDeleteThank you for such a kind comment! :)
ReplyDelete