Hello everyone! I am so excited for the chance to work with beautiful wool by Penny Rose Fabric. I
made them into wool felt first, then I was ready to make something fun with them...
Look at these beauties!
Here are the supplies to make the wool flower bouquet bag:
{You will need}
Print out the flower petals and leaves from the
pdf file.
Blue Wool 36" (width of the wool) x 16" long after felting process(remember, when you do the felting process, wool shrinks)
Cream, pink, red,Brown, green, dark green Wool
Cotton fabric for lining if you decided to do so
Matching thread for the blue wool for your sewing machine
DMC floss -- Cream, green
{How to make the bag}
1. Fold the blue wool in half and trim off the top and the bottom to make it 15" long. Then, cut 3" wide strips on the side to make handles later.
2. To make the honeycomb smocking, take the bigger blue wool piece and measure 2" from the bottom and draw a line all the way across. Fold the fabric exactly on the line and sew 1/8" from the folded line. Then, draw 7 lines 1" apart parallel to the first sewn line. Fold the fabric on the lines, sew and repeat the process to make 8 sewn lines.
3. Measure 1/2" from both sides: that will be your seam to sew them together later. From that line measure and mark every 2"on the very bottom sewn line. Where you marked the bottom line, sew the bottom line to the sewn line above it. Do the same with the 2nd and 3rd line but offset them from the bottom line by an inch. Repeat this pattern as you move up doing the 3rd and 4th line, then the 4th and 5th line and so on until all eight lines are connected.
4.Pin one side of the wool onto the ironing board then stretch the wool a bit. Press with the iron to set the texture you made: make sure your iron is set to wool.
5. Fold the wool right sides together and sew on the side and the bottom with 1/2" seam. Make sure all the sewn lines on the bottom match up. Open and press the seams. Sew the lines together on the seam to repeat the honeycomb smocking pattern on the side.
6. Fold the bottom corners to make a boxed bottom. Make sure the seams line up perfectly for a nice finish. The line measures 1" from both ends to the middle, so it is 2" long when it's finished. Do the same to the other bottom corner.
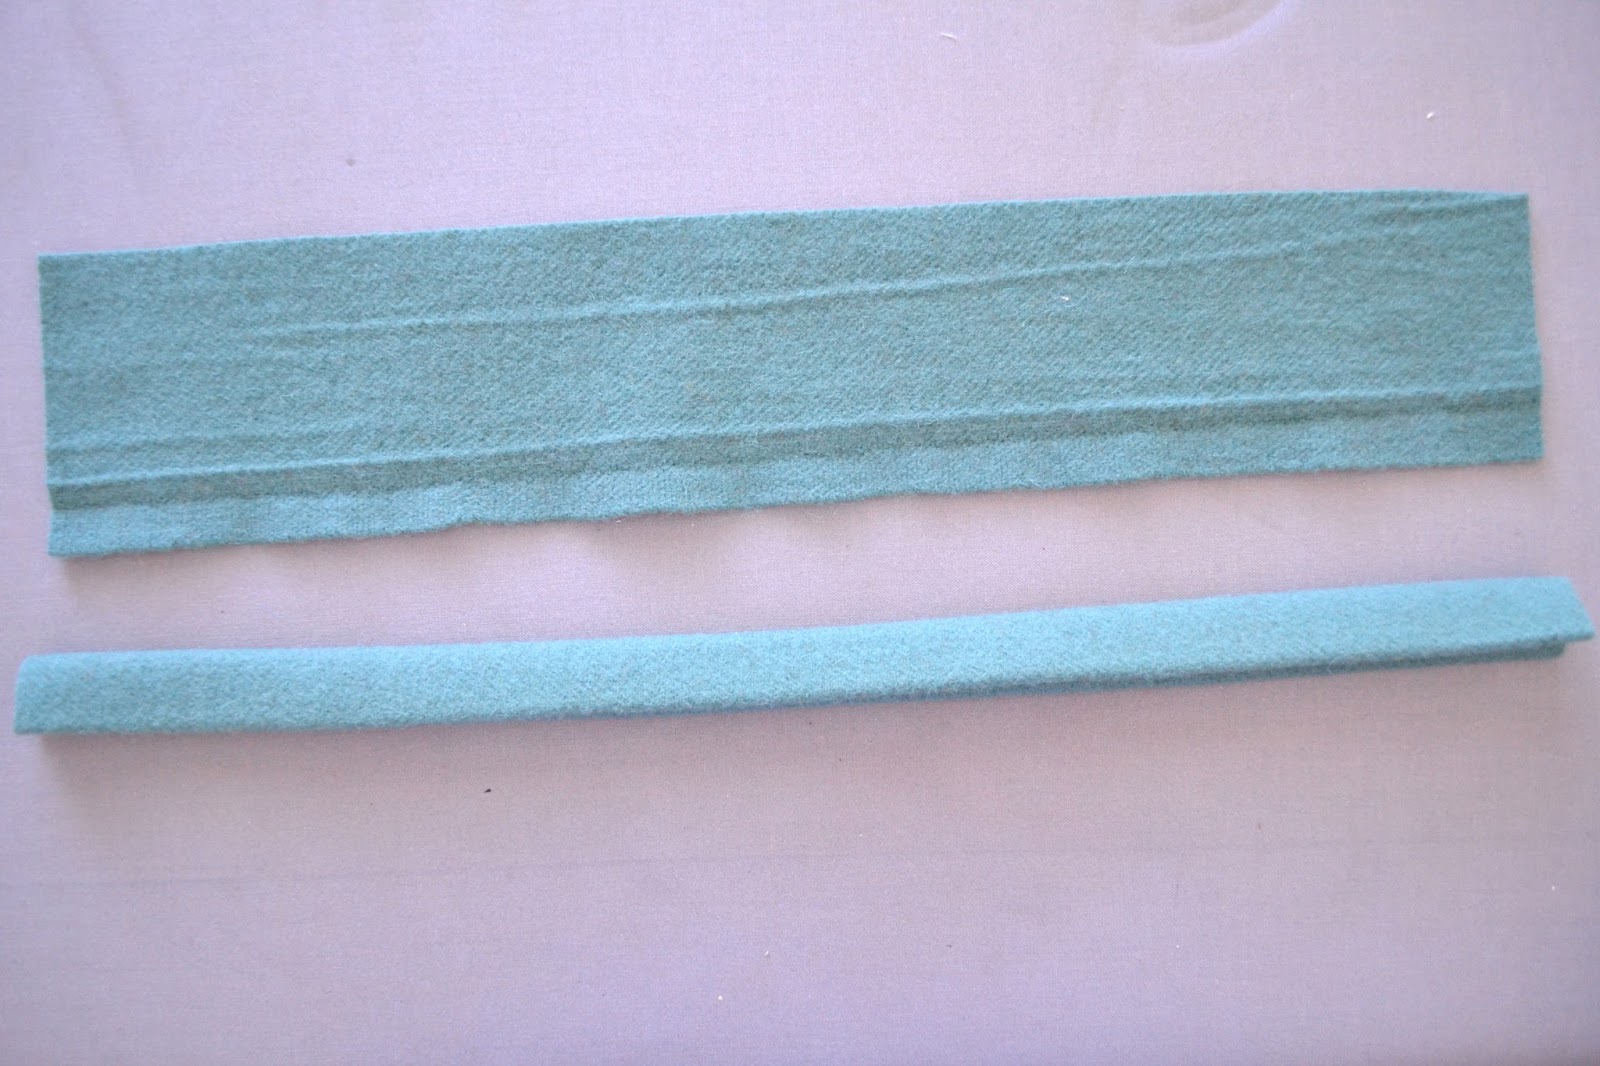
7. Fold 3" x 15" strips. Bring both long edges to the middle, press with the iron and fold it in half, then press with the iron again. Sew the seam with 1/8" to 1/4" seam.
8. I will not go over the steps to make the liner, but if you decide to do so, make the same size bag with cotton fabric. Make a boxed bottom too, so it will line up and fit nicely with the wool bag.
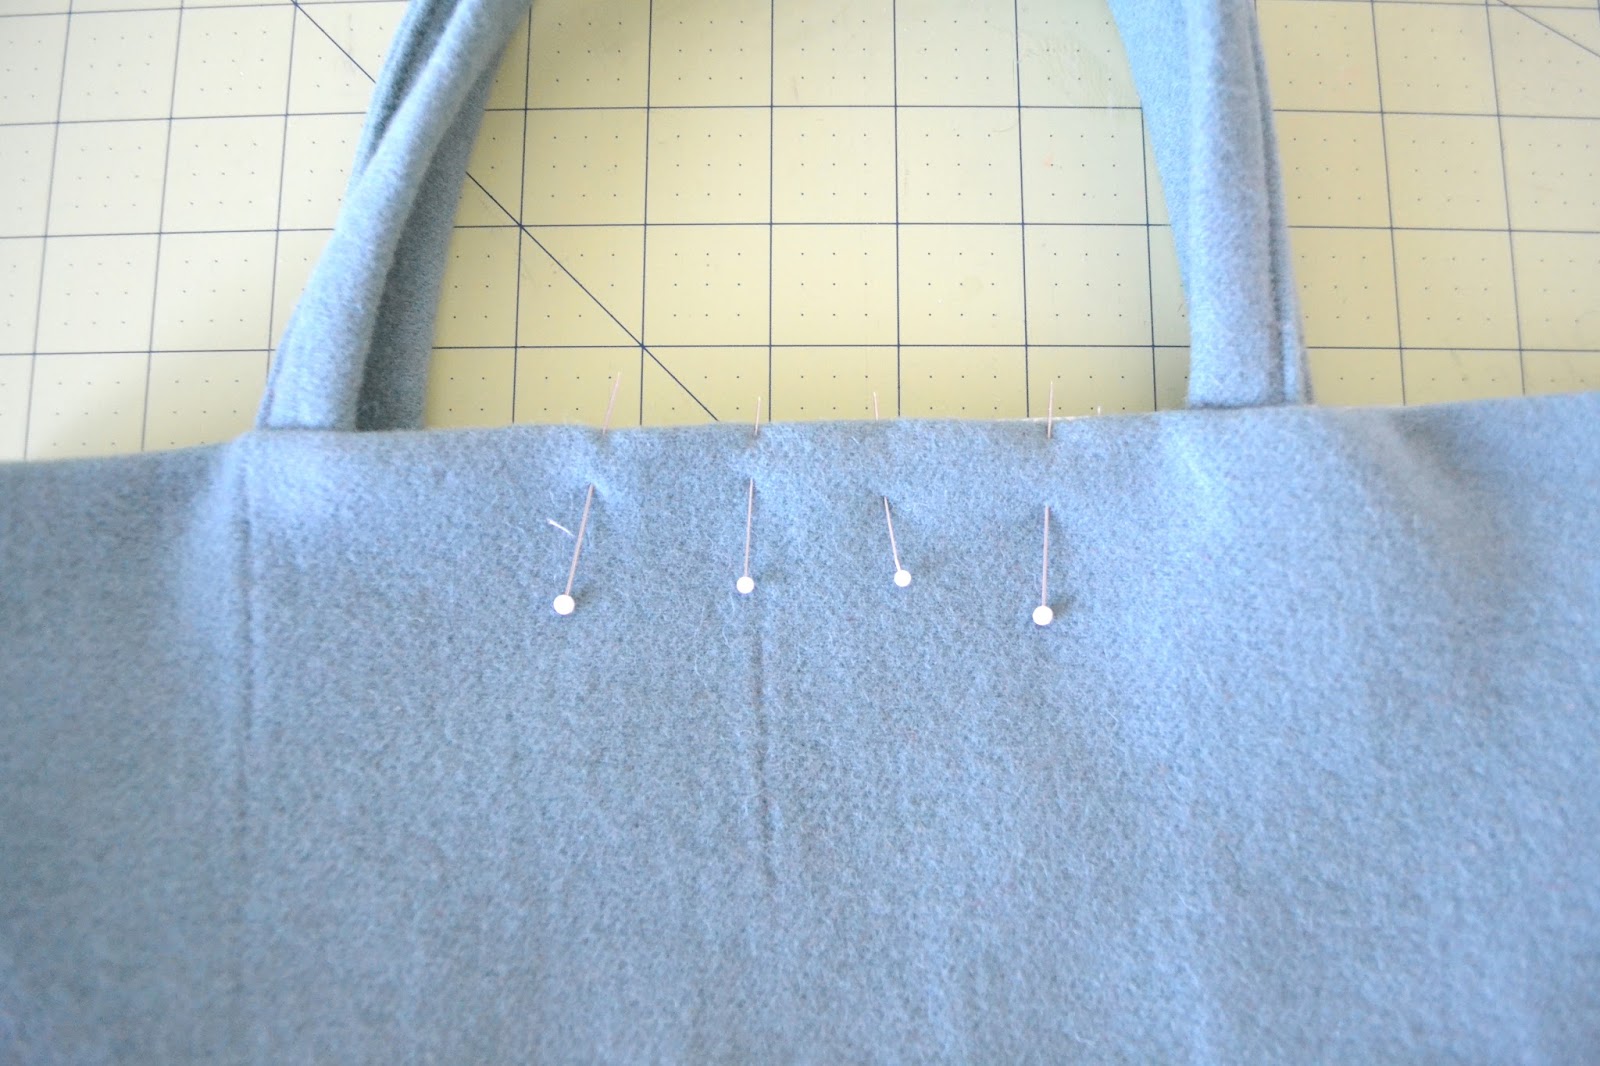
9. Put together the wool bag and the liner right sides together. Measure 3 1/2" from both edges and slide in the handle up side down and pin all around. Leave 4" opening for turning; sew all the way around. Turn the fabric inside out and fold the opening edges and pin.
10. Sew all around it with 1/8" seam.
{How to make the flowers}
* Cream flower
1.Cut 10 cream petals, 1--- 1 1/4" Brown circle (clip all around it), 1--- 1/2" dark green circle
2. Pinch the bottom and sew.
3. Sew 5 petals together. Make one more of this and layer them together. Make sure the bottom layer flower petals are showing from between the flower petals on the top layer.
4. Add Brown and dark green circles on top of the flower and stitch some french knots in the middle. Make two flowers.
*
Red flower
1. Cut 4 1/2" circle.
2. Start cutting from the middle in a continuous arch pattern.
3. Start rolling from the middle and keep rolling to make a nice flower shape. Stitch the back so it won't come undone. Make three flowers.
*
Pink flower
1. Cut 1 1/2" x 4" strips. Fold it in half and make cuts from one side to the other side.
2. Start rolling it from one side to the end. Stitch the back so it doesn't come undone.
*
Leaves
Cut out 19 leaves from green and 5 leaves from dark green.
{Assembly}
1. Cut 1--- 1/4" x 2 1/2" stem and 2--- 1/4"x 4" stems and lay them out with the green leaves. Stitch them up to the bag with DMC floss.
2. Sew cream flowers to the bag. These will be the main focus, it is important to find the right balance.
3. Stitch the dark green leaves.
4. Sew red flowers on to the bag.
5. Sew pink flowers to the bag. This helps to balance things out or to hide odd openings too. With cream color DMC floss stitch groups of french knots in a few places.
Then all you need to do is to enjoy the bag!
I can't get enough of the honeycomb smocking!
I hope you enjoyed my tutorial today! :)


This is a gorgeous bag! Thanks for the great tutorial!
ReplyDeleteFor step 3 on the smoking, is this sewn by hand? And is there a certain stitch you would suggest?
ReplyDeleteYes, I sewed this by hand. I just stitched back and forth slightly underneath the top so that the stitches won't show.
DeleteI love the bag, the flowers make it really special. Well done!
ReplyDeleteThis is amazingly gorgeous! Tfs
ReplyDeleteYour bag is amazing. Love it! Thank you for sharing the tutorial.
ReplyDeleteBeautiful. From the smocking to the sweet and gorgeous flowers - you did a stunning project.
ReplyDeleteWhat a beauty! Excellent work! I, too, love that smocking!
ReplyDeleteThis bag is just gorgeous! I love the variety of flowers and the smocking.
ReplyDeleteSimply beautiful! You make the most amazingly amazing creations Sachiko!!
ReplyDeleteI can't believe you are so kind to share such detail about how to make this beautiful bag. You didn't just save it for yourself. You are so generous and talented. I pray you have a beautiful blessing today in return. Thank-you
ReplyDeleteThat is just gorgeous!!
ReplyDeleteAnother gorgeous make. You are so creative. Thanks for sharing the tutorial with us.
ReplyDeleteSome people produce work that is very skilled and precise and others have great artistic vision. You are blessed with both. Thanks for sharing this beautiful bag!
ReplyDeleteBeautiful!
ReplyDeleteLove it! Flowers are stunning--can't stop looking at this beautiful bag. Colors you chose look awesome too! You are truly an artist!!!
ReplyDeleteYou have outdone yourself this time. It is probably the best, most short step by step guide that I have ever seen. best-heavy-bag-stands-reviews
ReplyDeleteWow, I absolutely love it!
ReplyDelete