Showing posts with label baby lock sewing. Show all posts

Friday, June 27, 2025

Sewing with My Baby Lock Victory ~ Skirt

As I mentioned in my previous post, all my projects in 2024 were quilts. After receiving the Babylock Victory serger, my desire to sew more garments increased by 100%! I have many Japanese sewing books and American patterns I bought from Joann's. I have many apparel fabrics and knits for future projects. I have no shortages there. All I need is to just start. I guess the hardest part for me is deciding the perfect match of sewing pattern and fabric. Sometimes this process takes months and years for me, because I see many possibilities with the fabric piece and I have a hard time making a decision. I don't want to cut into the fabric and go "oops, I should have used this for something else". But, I am starting to think differently… saving the fabrics for a "special" occasion or purpose doesn't do any good for me or the fabric. I am not getting any younger and I should just sew something I want, wear them and enjoy them while I can!

My first project with my Victory was a simple white t-shirt. Today, I am sharing a skirt I made. Nani Iro Sewing Studio is a great sewing book and it is translated into English. If you are interested in trying Japanese patterns, this is a great one. I thought this skirt was totally my style and such a great design for day to day living.
After I traced the pattern pieces, it was time to start cutting into the fabric! I just needed to get over the fear of messing it up and just enjoy the process.
This is a pretty simple pattern to follow, but having a nice and dependable serger makes the process so much faster. I love to look at the clean edges too.
I love the waistband of this skirt, the front is smooth...
and has elastic on the back. I think it makes a little more elevated look.
The skirt was done in one afternoon.
Mr. TRH and I took a quick trip to southern Utah and I decided to take this skirt with me. Cotton skirts are always my favorite. Even in hot weather, it was breezy and comfortable. I love how this skirt fits me, so I will definitely repeat this one. I already sewed a couple garments after I sewed this skirt and I am going to share them soon. :)

Monday, March 31, 2025

Baby Lock Serger Victory, Me and My First Project

I have been SO excited about my new Baby Lock Victory. Because it's all new to me, I had to read the manual and watched some videos, but I was able to figure out how to thread the machine and sew my first project with the serger! Seriously, the jet air threading and needle threading system makes threading the machine a breeze! I used to dread threading my previous machine, but not anymore!

I decided to make a simple white t-shirt for the upcoming season. I used one of my favorite t-shirts as a template, tweaked some things and made a pattern. I love the neckline and the sleeve length.

I wanted a t-shirt that is not so see through; I was able to use thicker material. It is a little oversized style with shorter length, which is perfect for my short torso. This reminds me of one of the reasons why I love sewing; you can customize your creation to your needs and wants.
I know I just sewed one of the most used t-shirts for this Spring and Summer. Stay tuned for more sewing projects in a future post! :)

Wednesday, March 26, 2025

Nightingale Quilt Completed and Gifted

I finished this quilt at the end of last year, but I didn't have a chance to take a picture until recently. I am finally ready to share it!

I made this quilt for my second son as a "grown man quilt". As I was browsing for design ideas, this came to my mind. You can find the pattern at Lo and Behold Stitchery and the shop has other beautiful patterns you will fall in love with! I just changed up the colors to make it more for my son and he loved it. :)

Guess what? Shortly after I started making this quilt, my son got engaged. Their wedding is in less than a couple months! I am going to start making their wedding quilt. I gotta go!

Wednesday, September 25, 2024

North Star Wedding Quilt

Let me introduce you to my most recently finished quilt, "North Star".

I have always wanted to make a quilt for my children when they are getting married. Shortly after my oldest son got engaged, I started brainstorming quilt designs. I was going through the quilt books and patterns I already had. Then I came across the acrylic template by Jen Kingwell's "North Star". I love the meaning and sentiment North Star carries; Constant, guidance, direction, stability, etc. I thought it would be a perfect block to use to construct the quilt for the happy couple. I also asked his fiance's preference in design, then found out that she likes a simple, timeless and clean design. I combined his fiance's favorite color blue and my son's favorite color green. After making some sketches, I came up with this quilt.

I finished making it a couple nights before the wedding day (phew! That was cutting it close) and I was able to gift it to them. I asked them if we could do a photo shoot with the quilt later. Between their schedule and my health issues and all, it took a while to do the photo shoot, but it finally happened! They were such good sports about it and I had fun shooting their photos with the quilt.

Aren't they so cute?! Lastly, the quilt label I created in the back of the quilt reads:

Love is like the North Star. In a changing world, it's always constant. - Gorden B. Hinkley
May your life be filled with love and happiness.- Mom

Monday, September 2, 2024

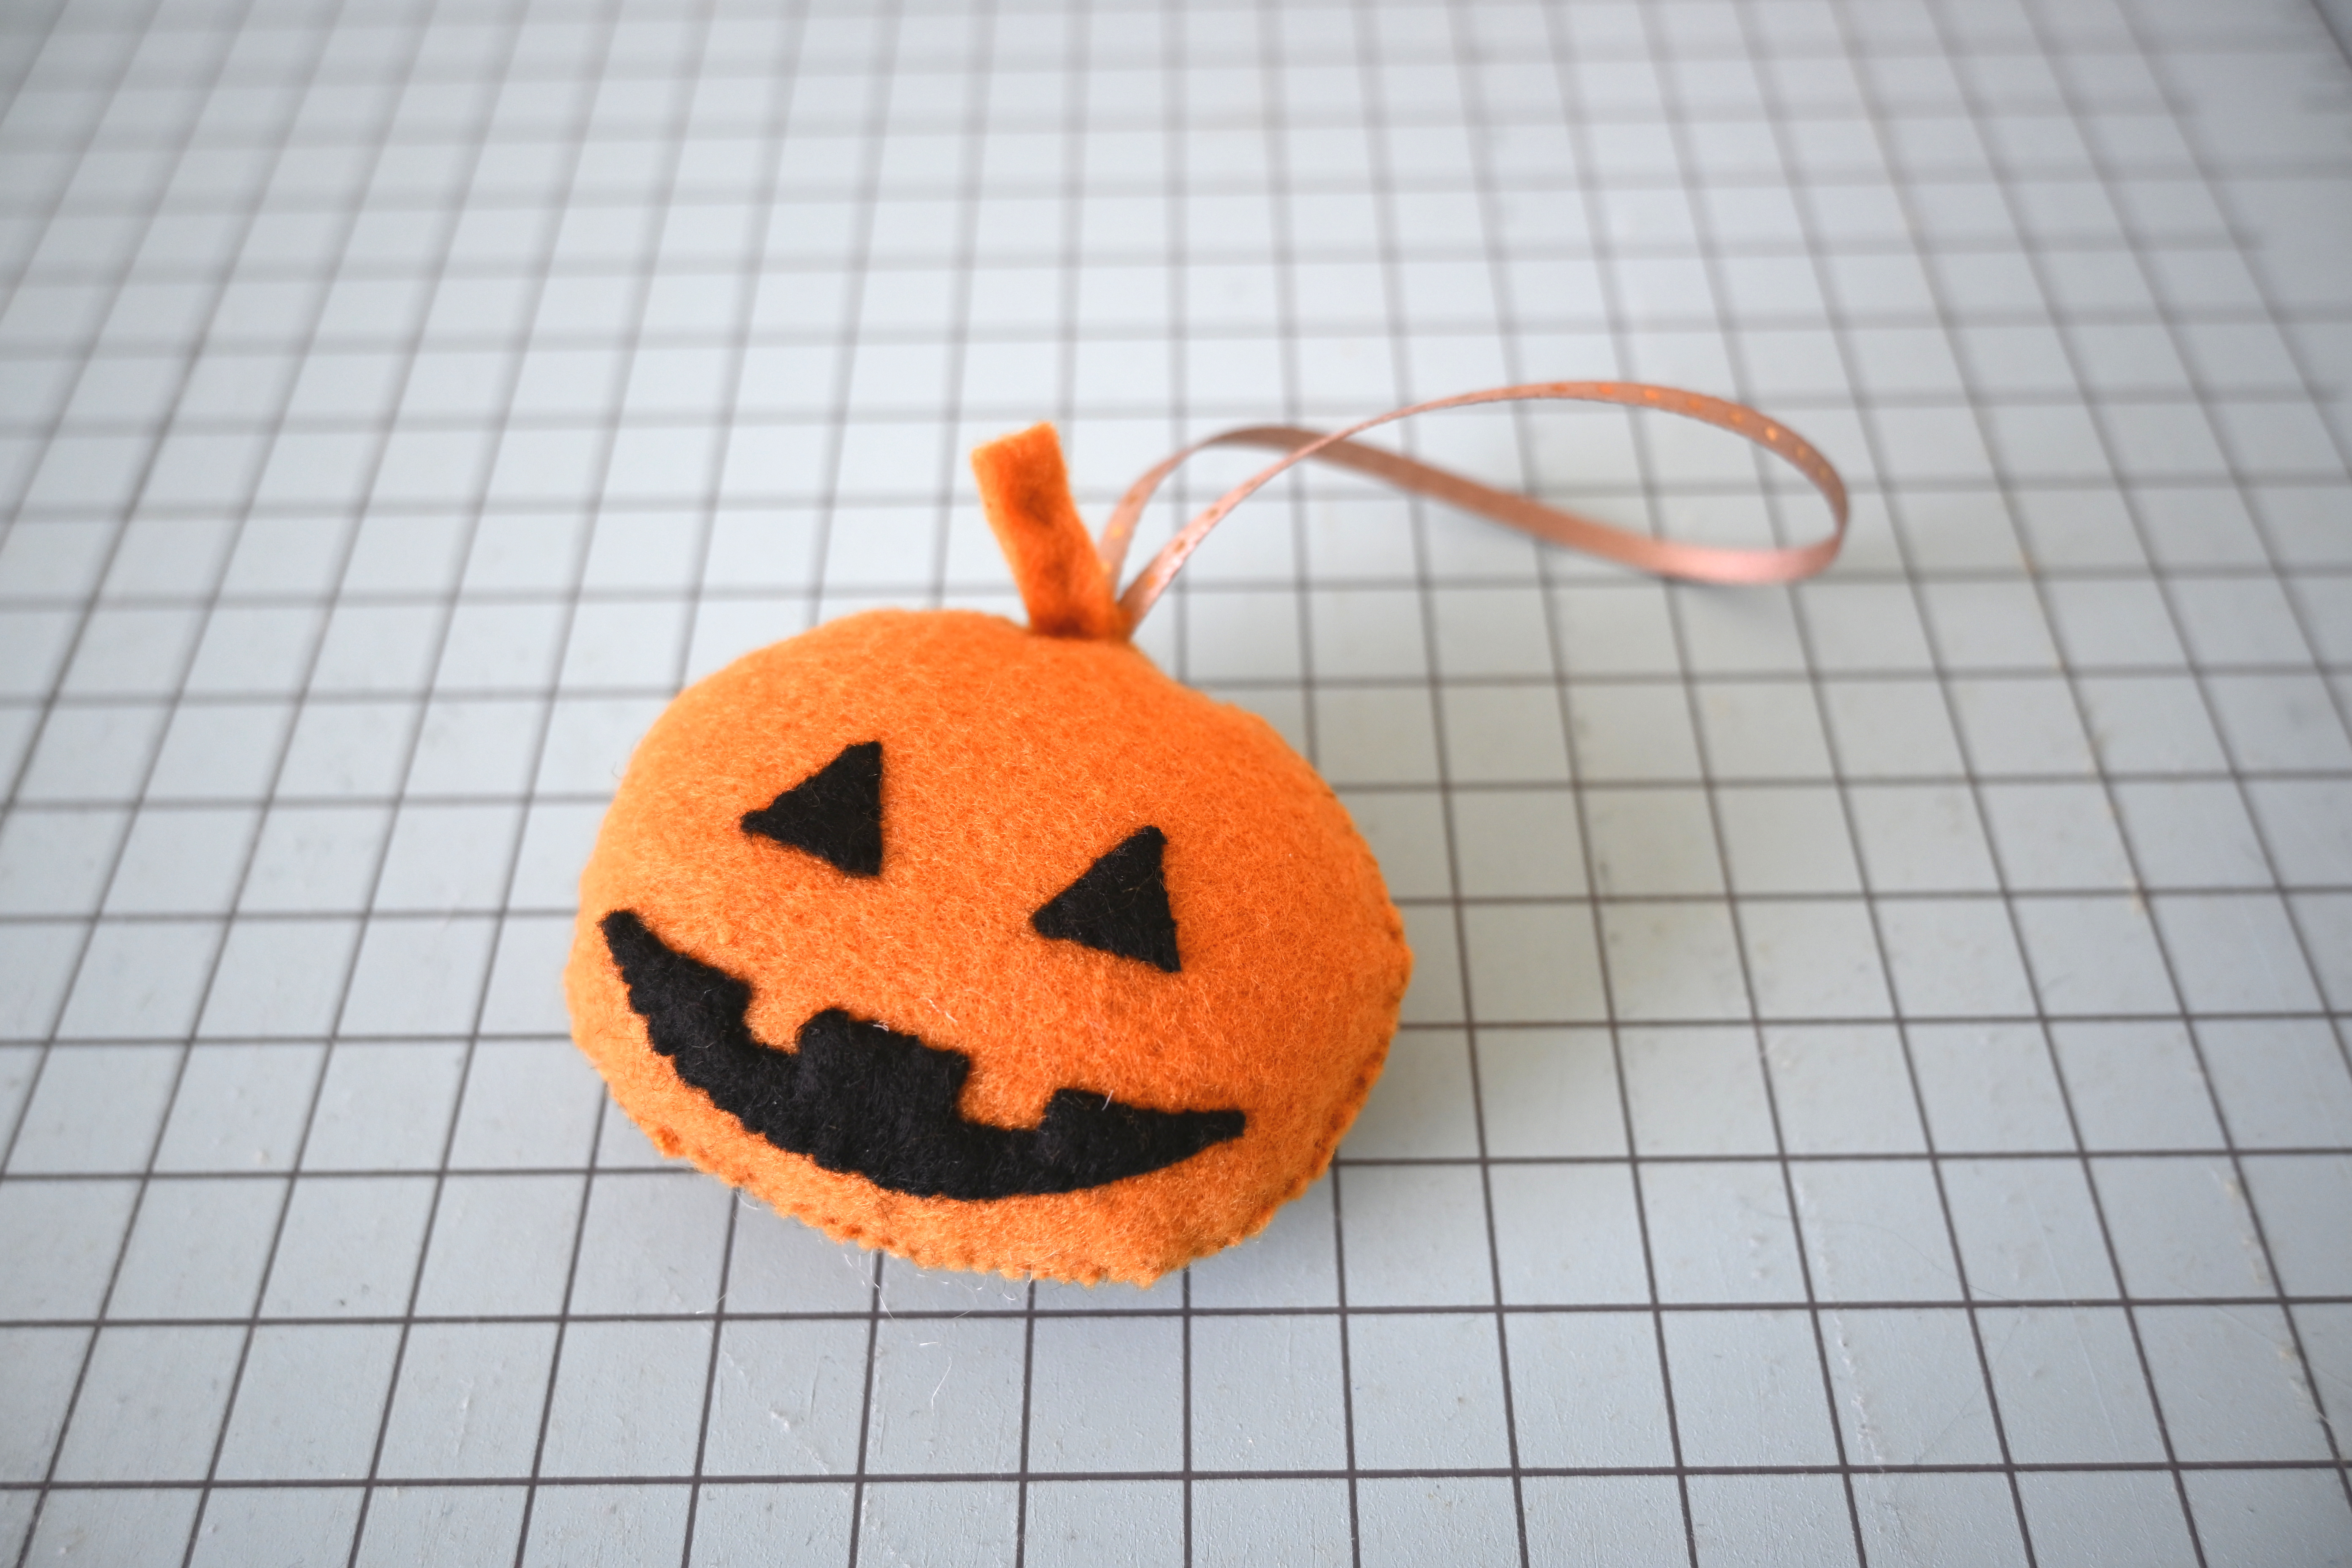
Felt Pumpkin Tutorial with Printable Pattern

October last year, I did a tutorial post to make Halloween Trick or Treat Bag. It was a post to showcase what that Baby Lock Sashiko machine can do. It was one of my most popular posts. Then, I found out that many people were interested in how to make the felt pumpkin I made to accessorize the bag. The felt pumpkin was something I made up at the last minute and hand sewed, so I didn't include that in the tutorial. Today, I am going to share the tutorial and a printable pattern! I hope you will enjoy it.

* You will need

Pattern
Orange and black felt (you could use wool too)
Orange and black embroidery thread
Stuffing
Thin Ribbon

* How to

1. Print out the pattern and cut them out.

2.Use the pattern and cut out the necessary parts.

3. On the original felt pumpkin, I embroidered the eyes and mouth, but I decided to cut the shapes out of the black felt and applique them instead. I wanted to show you different options. I used 1 strand of thread and stitched with whip stitch. You could do this with blanket stitch if that is what you prefer.

4. Fold the long orange felt piece in half and stitch the middle to make a stem.
5. Stitch down the stem and ribbon to the inside of the back piece of pumpkin.
6. Put the front and back of the pumpkin pieces together. Start from the bottom and leave about 1 1/2" open to stuff. I used whip stitch with 2 strands of thread. To secure the stem and the ribbon I sewed the top area twice.
7. Time to enjoy!
You could make this as a home decoration or a gift. Instead of sewing in the ribbon, you could add a pin on the back to make a cute badge too. There are many ways to enjoy this little felt project.
If you are curious about the Halloween trick or treat bag, please hop over to my tutorial to check it out!

Tuesday, July 30, 2024

Textured Gauze Top with Baby Lock Sashiko

I wanted to make a light and versatile top using gauze for a while. Also, at the same time, I wanted to add texture and a unique element to it. After thinking about it for a while, I decided to use my Baby Lock Sashiko and experiment with it. I bought 1 yard of gauze at Joann’s and used Madeira premium quilting thread for this project. I made a very simple pull over top; no buttons, no zipper, no fuss. Also, I usually wear XS or S, so for this project 1 yard was enough. If you have a sewing pattern you want to use it may require more fabric or you are blessed in stature, you will need to adjust the amount of the fabric you buy. Let me share what I did to make this top.

*You will Need

1 yard of gauze (as I mentioned in the beginning, adjust this according to the design or your size)
Good quality thread
T-shirt or knit you love and want to use as a template

*How to
1. I prewashed the fabric first just in case of shrinkage and then I lightly ironed it. There is a great blog post on prewashing at Seamwork, if you are interested. Then,I trimmed the top and the bottom of the fabric to make it into a nice rectangle. I drew a diagonal line from one corner to the other corner. This is the first line you stitch on. After that I attached my quilting guide to determine where to sew next. I set it so that there would be a 1 1/4" width between the lines. It is a simple tool, but it's such a time saver when you don't have to draw each line by hand.
2. Start stitching with the Sashiko machine. It is a very different machine compared to a regular sewing machine, and it might be a bit intimidating, but once you get used to it, it is such a fun machine to play with to explore and expand your possibilities. A bit of advice I can give you from my experience is to use quality thread and keep a slow and steady speed.
3. Once you are done with stitching the whole fabric with diagonal lines going the same direction, draw another starting line in the middle from opposite corner to corner. This way, once you are done stitching, you will have a criss cross design.
4.I used a French sleeve sweater as a template. The textured fabric I created is not stretchable like a knit or sweater, so make sure to use an oversized t-shirt or sweater as a template; unless you are making a shirt with buttons or zippers. Otherwise you might not be able to pull it over your body.
Make sure to add 1/4" to 1/2" seam allowance when you cut.
5. Because the fabric will not stretch, I cut the bottom wider than the actual sweater.
6. I cut the bottom of the front panel shorter than the back, but this is totally personal preference.
7. Cut around the neckline.
8. Sew the shoulders, then I used my serger to treat the edge to keep it from fraying. You could use different stitches from your sewing machine if you don't have a serger.
9.Use the serger on the side of the fabric, from one end all the way to the other end. Mark where you want to sew on the sides. I used the sweater as a guide to where I wanted to start sewing under the armpit towards the bottom. I didn't want to sew all the way to the bottom, So I marked a few inches from the bottom as a stopping point.
10.Sew the sides, open the seam and press with an iron.
11. Sew the seam around the armhole and stitch down.
12. Press the seam around the bottom and stitch it down.
Front view...
13.I cut 1 1/4" strips to make bias tape and sergered one side and sewed the other side to the neck line.
14.Fold and press the sewed bias tape with an iron. Stitch it down.
Done!
This is just an example of what you can do with textured fabric. The possibilities are endless and I think it will be fun to make a light Jacket for fall.

Time to test drive this new top!
Blog Widget by LinkWithin