October last year, I did a tutorial post to make
Halloween Trick or Treat Bag. It was a post to showcase what that Baby Lock
Sashiko machine can do. It was one of my most popular posts. Then, I found out that many people were interested in how to make the felt pumpkin I made to accessorize the bag.
The felt pumpkin was something I made up at the last minute and hand sewed, so I didn't include that in the tutorial. Today, I am going to share the tutorial and a
printable pattern! I hope you will enjoy it.
* You will need
Pattern
Orange and black felt (you could use wool too)
Orange and black embroidery thread
Stuffing
Thin Ribbon
* How to
1. Print out the
pattern and cut them out.
2.Use the pattern and cut out the necessary parts.
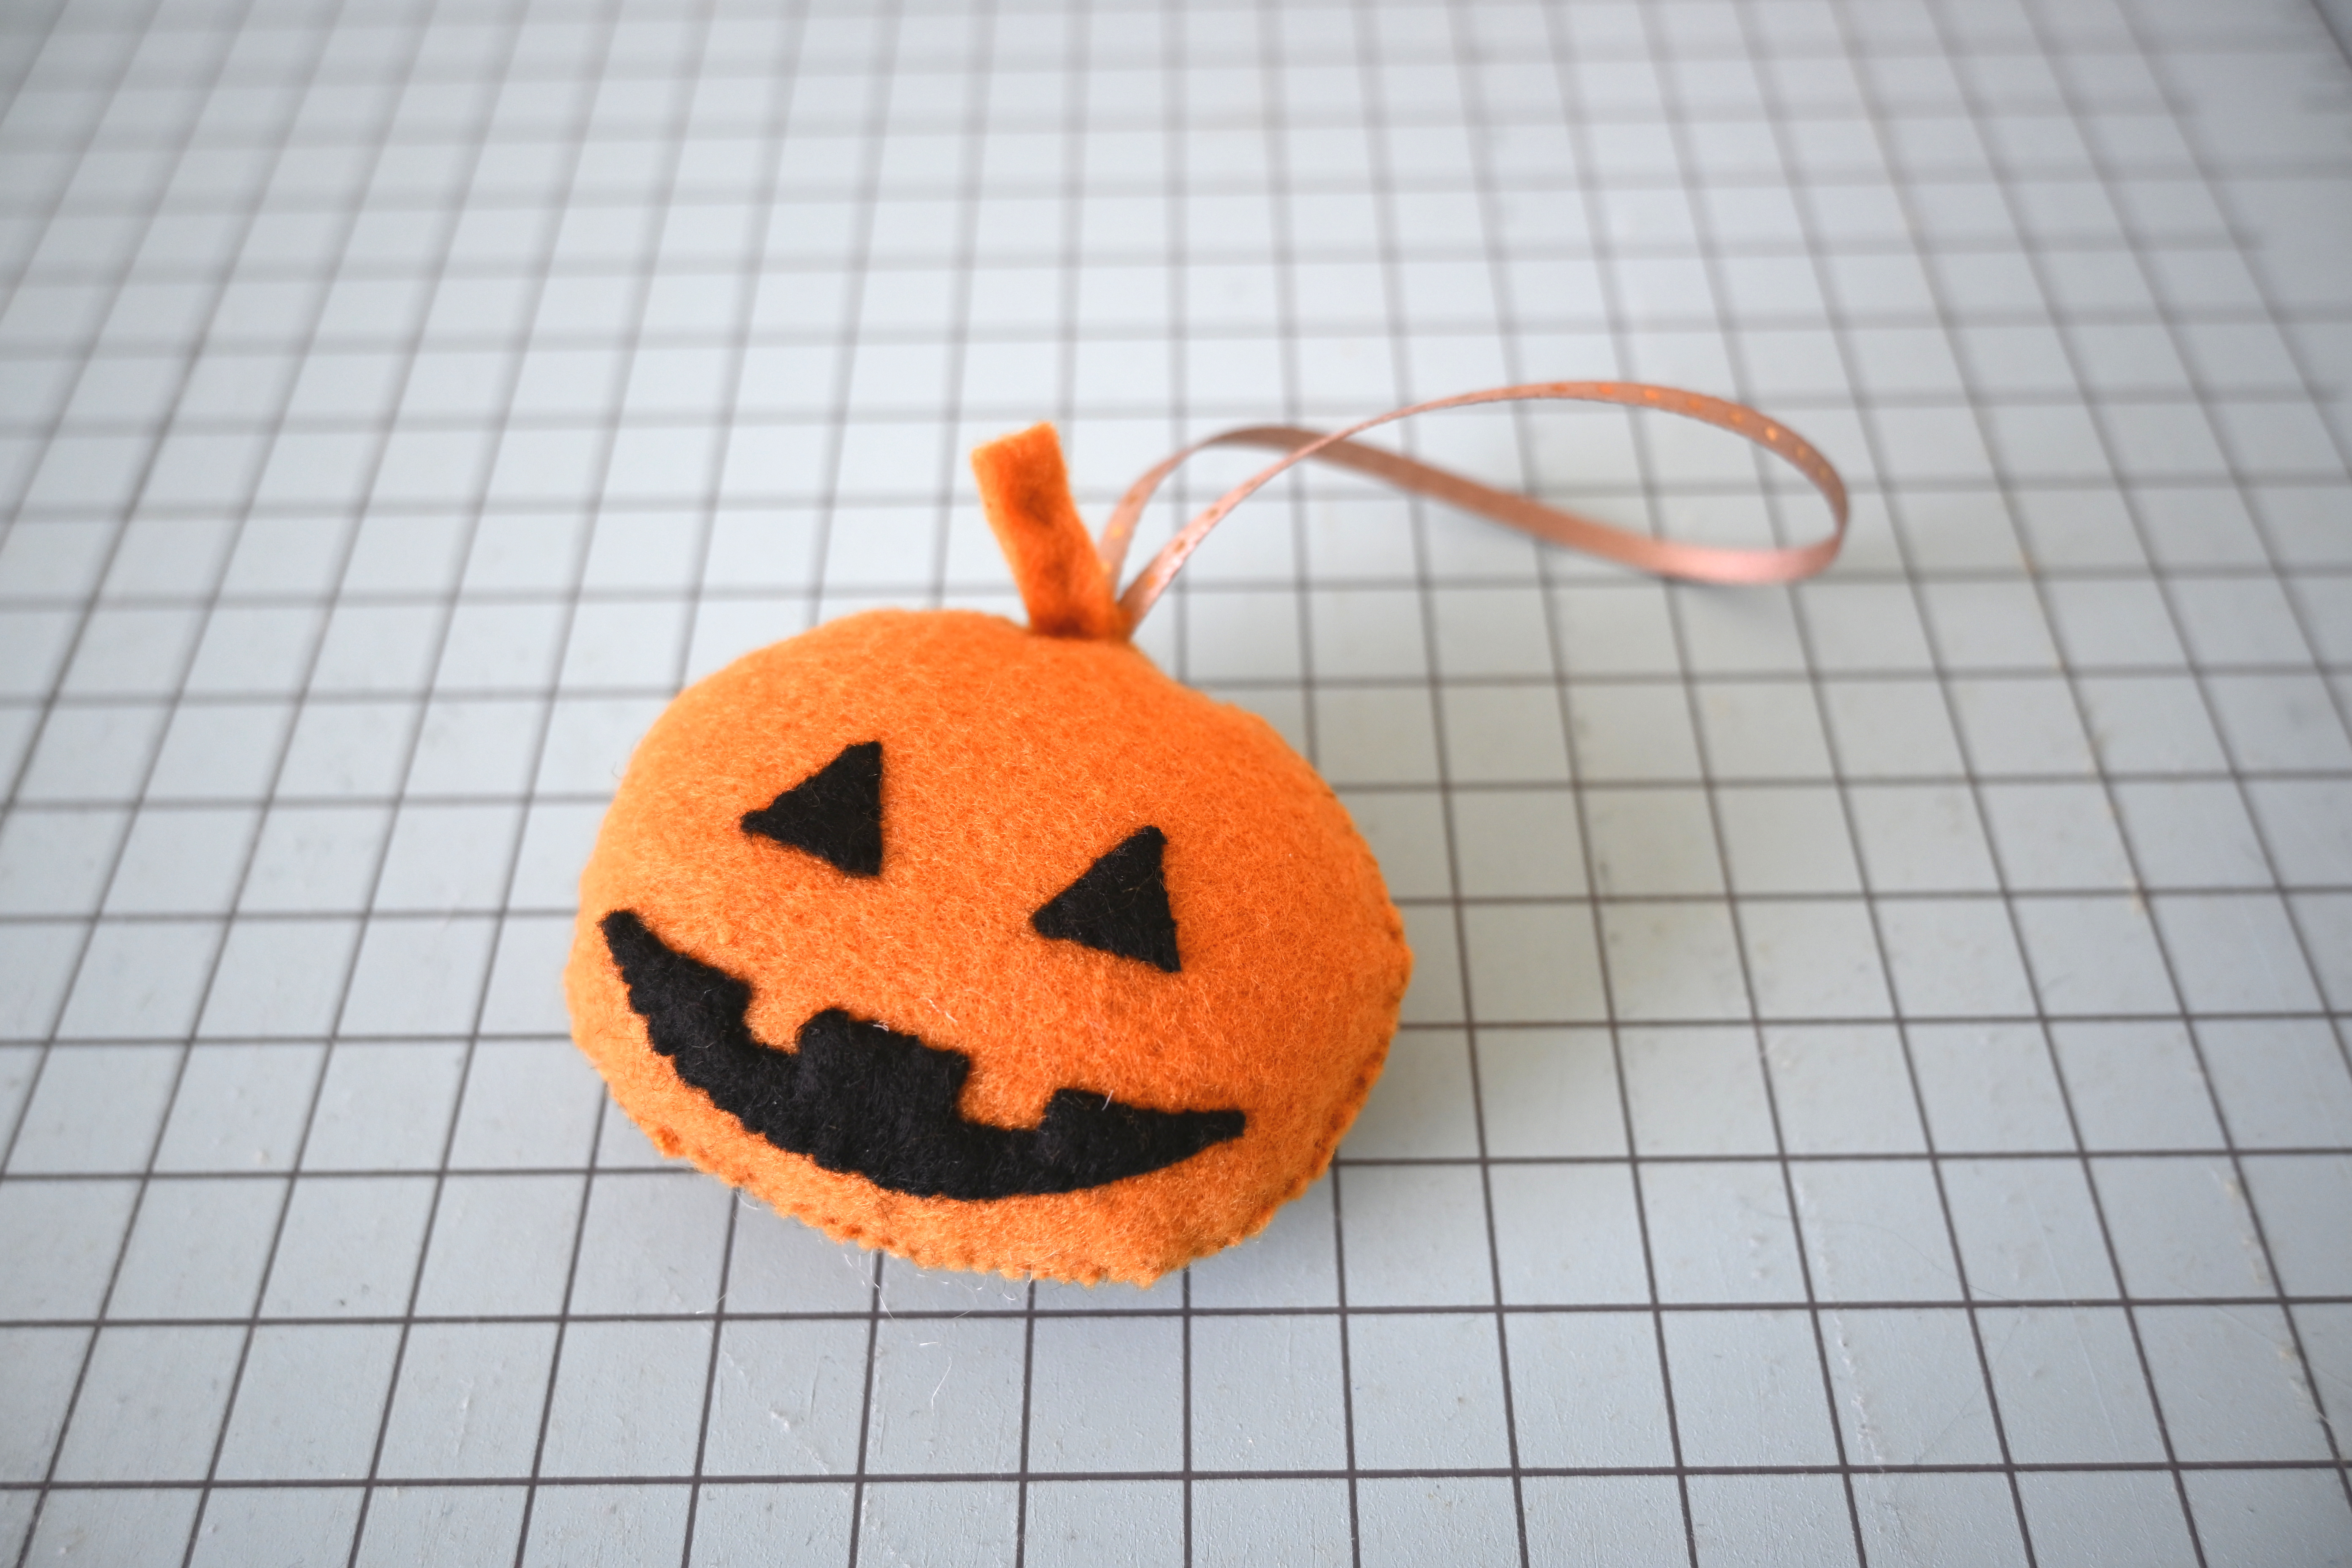
3. On the original felt pumpkin, I embroidered the eyes and mouth, but I decided to cut the shapes out of the black felt and applique them instead. I wanted to show you different options. I used 1 strand of thread and stitched with whip stitch. You could do this with blanket stitch if that is what you prefer.
4. Fold the long orange felt piece in half and stitch the middle to make a stem.
5. Stitch down the stem and ribbon to the inside of the back piece of pumpkin.
6. Put the front and back of the pumpkin pieces together. Start from the bottom and leave about 1 1/2" open to stuff. I used whip stitch with 2 strands of thread. To secure the stem and the ribbon I sewed the top area twice.
7. Time to enjoy!
You could make this as a home decoration or a gift. Instead of sewing in the ribbon, you could add a pin on the back to make a cute badge too. There are many ways to enjoy this little felt project.
If you are curious about the
Halloween trick or treat bag, please hop over to my tutorial to check it out!


No comments :
Post a Comment