Thursday, November 13, 2014

Just for You Book Giveaway Winner!


OH. MY. GOSH. I went out twice today; first in the morning to meet up with a friend, and second to pick up my kiddos. It was freezing COLD!! I prefer cold more than hot, but still... I can't believe how cold it was today. It seriously became the season where it is nice to just stay home and sew.

So, speaking of sewing... Are you already to find out who the winner is for the fantastic book "Just for You"? This book will give you great ideas of what to sew and the instructions all winter long and keeps you busy! Ok, here is the lucky winner...

Melanie (of Mostly Craft)

Congratulations!!! Please email me your shipping info, so I can pass that along to C&T publisher and they can send you the book.

Thank you every one for participating. I will announce what I am going to giveaway for the Thanksgiving giveaway so come back to check it out! :)

Monday, November 10, 2014

Craft Room Tour / Interview at Cut Out + Keep


I have been away last week to attend a quilt retreat with my friends and it was so much fun! Since it was my very first retreat, I had no idea how many projects I should take and all. I didn't finish any projects, but made really good progress. I was too busy visiting and eating! I will share my projects when I am finished with them someday.

I had fun being interviewed by Cat of Cut Out + Keep. My craft room tour and the interview is on their blog. Please hop over to see more pictures of my sewing room and read all the fun questions and answers.

Happy Monday!

Thursday, November 6, 2014

Just for You Blog Hop / Giveaway!

The blog hop for "Just for You" has started this week and I am SO excited to introduce this book to you, if you haven't already heard about it. Caroline and Sarah of Blue Susan Makes put together this amazing book with other sewing bloggers.

...and guess what? My project is also in it. Yeah! What a privilege it was to work with them!

My contribution to this book was the fabric covered beads necklace with corsage. In the book you will see their version of the necklace; I love the color combination and the fabric they chose. Here is my version.

This book contains 24 projects and it was so hard to pick a few of my favorites to share on this blog post. Seriously, if you are thinking about sewing something for yourself, this book is it. Let me name a few... bag, scarf, belts, clothing and much more! What I love about this book is that they used many step by step pictures to explain things. I am a very visual person, and English being my second language, this helps me a lot.

I added this Quilting Bee Dress by Caroline to my "Things to sew" list. The shape of the dress is pretty much what I was looking for!

This unique Painter's Clutch by Sarah is also one of my "must sew" projects. It is a classic fold-over style with handles, but the handles are the actual paint-stirring sticks! How fun is that? I know I have a few in my garage, I was saving them for this project!

Next one is this adorable Pretty Pockets Apron by the ever talented Maureen. Would you have ever guessed this apron was created from only five fat quarters? How did she come up with this?

Then the last one is this Mini Dresden Coin Purse by Amy. I love the design on this purse and I can even think of which fabrics I can use for this project from my scrap bin. What a fun thing to make. :)

Now here is the awesome news! I get to give one of you lucky readers this fabulous book. Just leave a comment on this post and I will announce the winner on November 13th. US winners will receive a book to hold in their hands courtesy of Stash Books, International winners will receive the eBook version. Please don't forget to visit all the stops on this month long celebration to see who else contributed to "Just for You" and their fabulous projects!


Tuesday, November 4, 2014

Stylo ~ Flannel Jacket


It was really hard not to spill the beans for a while. I was invited to contribute to a section of "1 fabric 5 designers" in Stylo magazine. Stylo is the first fashion forward eMagazine centered around children's sewing patterns and style. After I accepted the challenge happily, I received 2 yards of beautiful flannel from Miss Matatabi, from japan. After going back and forth, I decided to use a pattern I found in a Japanese sewing book ‘ほんのり sweet 女の子の服 ‘ by 荒木由紀(Yuki Araki). Here are the results...

I also made a headband to go with the top.

In the sewing book, it was introduced as "cardigan" and it was made with knit. I thought if I made it with flannel, Rachel could wear it more like a shirt or jacket.

I added the belt loops and small pom-pom trim with velvet ribbon to finish it off.

My friend Kristina of Kristina Bills Photography took these beautiful pictures for me. Thanks, Kristina!

After waiting for a while, I was so happy to go through the magazine for the first time. BOY it is AMAZING! Other contributors did such an amazing job... I mean the choice of fabric to sewing to such stylish photos. I was in ooh's and ah's, and inspired by them so much. Head over to check out Stylo right now, you don't wanna miss this issue!!


Monday, November 3, 2014

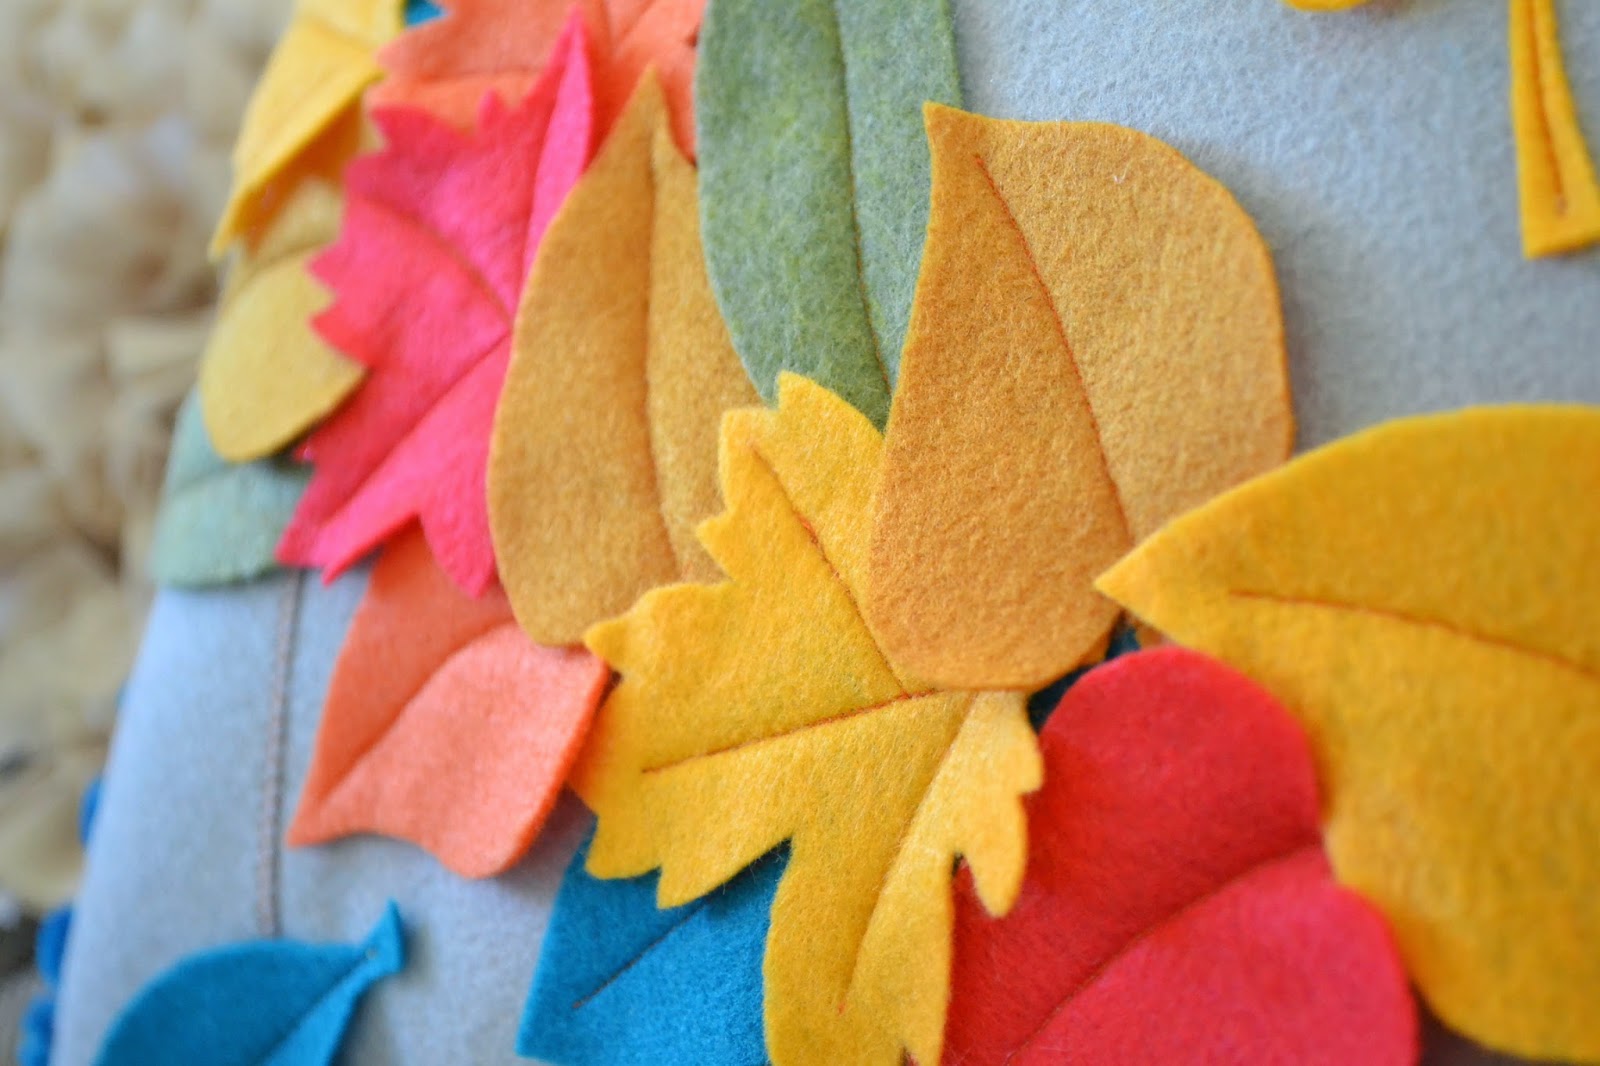
Tutorial ~ Leafy Felt Pillow


Hi everyone! Amber of the amazing blog, Crazy Little Projects, is doing a fun sewing challenge every month. This month's theme is "Gift items". I was so excited to be asked to be a part of it and to share my project today!

Halloween is behind us and Thanksgiving is approaching. Is your home all decorated for fall? I love decorating my house with some things appropriate to the season. I thought it would be fun to make a decorative pillow with a bunch of leaves with a little splash of jewel color.

That. is. not. all. I created this pillow on a small budget. You might want to make several to give out to your family, friends, Thanksgiving dinner host, and even to yourself. Isn't it one of our dramas as a sewer/crafter that the cost of materials add up! If you were looking for something nice to make on a tight budget, this might be what you are looking for. :)

{You will need}--- and some tips, please read before you head out to shop

Felt --- They were having 4 for $1 sale when I bought them. I needed 10 felts (4 silver gray and one of each colors) which was only $2.50! They usually cost a little more. Since you only need about half the felt for each color for the leaves, if you decide to make two pillows, you can make each one for slightly less. You will need the colors below.

Gold, Golden rod, orange, coral red, olive, aqua, Silver Gray

The color of the thread you want to use --- I used dull orange colored thread from start to finish. If you don't want the color to pop against the gray felt, it is totally fine to use a different color.

1 3/4 yards of Pom-pom --- this can make the cost go up, but Jo-Ann Fabric always has coupons. Look for a 40% or 50% off coupon!

Fiber fill

{How to}

1. Cut 2 pieces of silver gray felt the long way. Now you have 4 pieces of 4 1/2" x 12" pieces.

2. Sew them on to the sides of the whole felt. Over wrap 1/4" on the seam and sew with zig-zag stitch. Do the same with the other pieces. Now you have 2 pieces of 12" x 17 1/2" silver gray felt.

3.Print out the PDF pattern for the leaves I created. Cut them out.

4. Trace them onto the felt. You need 22 leaves total. You can mix and match however you want.

5 Draw a nice wavy line. This will be a guide line for the placement for the leaves.

6. Pin the first leaf and sew then move on to the second leaf. Repeat the process until the leaves reach to near the end of the line.


7. Lay the back and the top felt together. Starting at the middle of the bottom, pin the pom-pom trim all around the pillow.

8. Switch the presser foot to Zipper foot on your machine. leaving 4" to 5" opening in the bottom, sew all around the pillow.

9. Stuff the pillow with fiber fill. Pin the rest of the pom-poms, front and back felt together. Sew the opening shut with your preferred method.

Now, you have a leafy felt pillow to give or to cozy up part of your house.


I hope you enjoyed my tutorial. :)

Happy fall!


Friday, October 31, 2014

Book Review ~ Learn to Sew with Lauren

In case you are wondering... yes, how to make this cute top she is wearing in the photo is also included in the book!

I was so thrilled when I received a copy of "Learn to Sew with Lauren" to review. Lauren Guthrie was a very popular finalist in BBC TV's Great British Sewing Bee. You can learn more about her, news, projets and tutorials on her blog.

Flipping through the pages, the thought came to my mind was, "I wish I had a book like this when I was learning to sew as a little girl!". The title "Learn to sew..." seems perfect for this book, because she took great effort to help you from choosing fabrics, sewing equipment, and many well explained basic techniques for people who are very new to sewing. Though, this book is not just for beginners. What is unique about this book is that the projects advances in difficulty from "beginners-Easy Peasy" to "improvers" and to "More Tricky". There are 20 projects in the book with full size patterns. Let me name a few; napkins, potholders, quilts, purses, blouses (yep, that would be one of the more tricky ones). You see, this book is for everybody who loves to sew. What I really love about her projects are her fabric choices. I am nowhere near an expert but I can pretty much sew everything in her book. But looking at her take on each item, fabric choices, and combinations inspired me to sew more!

Let me show you some of my favorites...

Envelope cushion cover is a very simple thing to make and perfect for a beginner. This is the perfect example of making something useful and stylish that doesn't have to be complicated. I adore her fabric choices.

This picture is actually for the trimmed cushion cover. This picture also inspired me with the texture and color. Simply beautiful.

Everybody need a Big bag. Some of the people who are close to me knows that I love bags. I seem to have things to carry all the time; my projects and sketch book to go, kids' library books, snacks in the car... so on so forth. This bag seems very roomy and I love the side pocket. This might accommodate all my needs...

The last one is the Placemats. I love the variation she shared; the one with cutlery pockets. How cute is that?? I might need to make some and invite my friends for lunch!

There are a LOT more pretty items to make in this book and I am sure that you will fall in love with her style. :)


Tuesday, October 28, 2014

Tutorial~ Liberty of London Framed Christmas Ornament


My love for the fabrics for Liberty of London goes back to when I was in junior high. There was a fabric store which carried them, in the city I lived, and whenever I had chance, I went to the store; I just admired it with sigh. When I had my first job in high school, I bought my first Liberty of London fabric... over the years I collected them here and there and I have a hard time cutting them.

But, what good would it do if I don't make anything and just let it sit on the shelf?

This year, I wanted to create a Liberty of London Christmas tree with hand made ornaments! Of course I will do the tutorials as well, in case you would like to make some. :) I have several ideas for the ornaments, and every now and then, I will post an ornament tutorial until Christmas. What do you think? Wouldn't that be fun?

So, the first one are these Framed ornaments. They are inexpensive and easy to make and I think this is one of the best ways to showcase some pretty fabrics.

{You will need}

Small wood frames
Acrylic paint
Card stock (index card would work too)
Liberty of London fabric scraps
Mod Podge
Cabachon or other findings to decorate the frame
Thin ribbons or trims
Small bell

{How to}

I found these ornament size wooden frames at Michael's for around $1.69 and they were 40% off! Not too shabby, huh?
1. Remove the twine and paint the frames. Set it aside to dry completely. Lay the frame on a piece of card stock. Trace inside of the frame. Then, add slightly less than 1/4" around the traced line and cut it out. You will need two to make one frame.

The card stock should be large enough to sit nicely but not too large to see from the front.

3. Apply a thin layer of Mod Podge to the card stock and lay that side down onto the wrong side of the fabric you are going to use. Add about 1/2" around it and cut it out.Apply a thin layer of Mod Podge on the card stock, then fold the corners first. This way you can fold the fabric in a miter, and the corners will be less bulky. Fold all sides and stick to the glue already on the card stock.

4. Apply more Mod Podge on the entire surface. Then stick the other card stock to it. Press and hold till dry or lay it on a flat surface with a heavy book on top of it.

5. Apply a thin layer of Mod Podge on the front to give a nice coat to protect the fabric.

6. Apply Mod Podge around the edges, then stick it to the painted frame. As you did on step 4, lay it on a flat surface with a heavy book and wait till it dries.

Nice clean back...
7. I added cabochons to decorate the frames, changed the string to a trim that I had and added a bell. This step is totally optional. Depending on what you use it will give a very different look to the finished ornament.


My Liberty of London ornament making has just started, but I am pretty excited about this idea. I can't wait to share the next one with you! :)
Blog Widget by LinkWithin