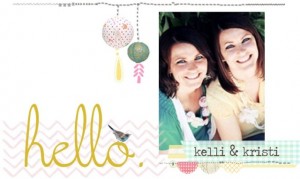
I am so happy that they agreed to help me out with my blog while I am in Japan. Infact, Kristi and Kelli provided me two separate posts. I will share the post from Kristi today, and Kelli's post in the next several days. :)
Enjoy their creativity! :)
**********************************************************
Hey there Tea Rose Home readers!
We met the uber cute Sachiko at a blog conference earlier this year and had a blast as her roommate; she is so sweet IRL and we are just thrilled to be her guesties today :)
To introduce ourselves, we are twin sisters Kelli & Kristi of Lolly Jane, an eclectic DIY blog with lots of craft tutorials, home improvement projects, furniture before and afters and even a tasty recipe or two.
We love to create and knock off overpriced retail items so when we saw a completed dress form jewelry stand at our local craft store for over $20, we knew we could replicate the look for less:
We picked up all of our supplies at Michaels Craft Store and used our 40% coupon on the dress form.
Supply list:
8" dress form, round base x2, finial, white acrylic paint, foam brush, skinny ric rac, spray adhesive, hot glue, fabric*
*fabric measurements roughly 12x10
To create:
1. Paint all wooden pieces
2. Wrap fabric around dress form and mark 2 creases underneath breast area
3. Stitch (2) 1.5" creases underneath the dress form breast area so fabric lays flat when pulled
{Warning: you get kinda handsy with your mannequin!}
4. Spray fabric glue on dress form and press fabric on, smoothing out any lines and/or bubbles as you go
5. Fold a small crease along each shoulder so fabric will lay flat
6. Fold all fabric underneath and secure with a dab of hot glue.
Once the dress form is dressed all pretty, simply hot glue the skinny ric rac along the sides of the form, covering any seams (see pics below*) and along the neckline.
*Note: I saved a 1.5" scrap of fabric to cover the back and make it look more complete.
Hot glue all the pieces together {see final product} and you're done! Pretty easy and now you've got a sweet little dress form jewelry stand to show off your bling!
Here she is all dolled up!
We'd love for you to stop by our list of current tutorials, FB, Pinterest or Twitter pages to say HI :)
Love ya Sachiko- hope you have so much fun at home in Japan!
XOXO
Kelli & Kristi
*********************************************************
The dress form is so pretty and looks like a fun project to work on. The great thing about this project is that, you can choose the fabric of your style, and the dress form will look so different. Thank you Kristi for the fun post!


The names (Kelli and Kristi) sound Estonian, is there any chance theyre related to the country somehow :)? Asking, because im Estonian too.
ReplyDeleteOther than that, great idea :) Love creating stuff i see at the store myself for half the price!
Thanks bunches for having me (us) today Sachiko!!
ReplyDeleteXOXO
ps We're a mix of our Mexican and Croatian grandparents, Reet! ;)