Showing posts with label Babylock. Show all posts

Tuesday, January 10, 2023

Scrappy Strip/String Quilt

I remembered that I didn't get around to posting this quilt I finished in November. I used the same method that I used to make strip pillows in October. I used 4 1/2" x 4 1/2" tissue papers for the pillow, but I used 6 1/2" x 6 1/2" papers for this quilt, that's it! It is done by exact same technique, just bigger. If you are in interested in the tutorial you can click the link.
After I finished piecing, I wondered how I wanted to quilt it. The options are:

A. Ask someone with a longarm to quilt it for me.
B. Quilt it myself with my machine. I am not that good at it, but it will be good practice.
C. Hand quilt it.

I tossed and turned... well, maybe not that much, but I finally decided to hand quilt it with thick thread and big stitches. I was second guessing myself while I was working on it, but I actually love how it turned out!
I like using pieced fabric for the back of the quilt. It is more work, but I love the small surprize when you turn the quilt over. It adds more interest and character. The hand quilting is more visible on the back side and I love it!
If you have lots of scraps, this quilt is perfect for them. It is easy, quick and fun! Do you want to add it to your "to make" list for this year?

Thursday, December 1, 2022

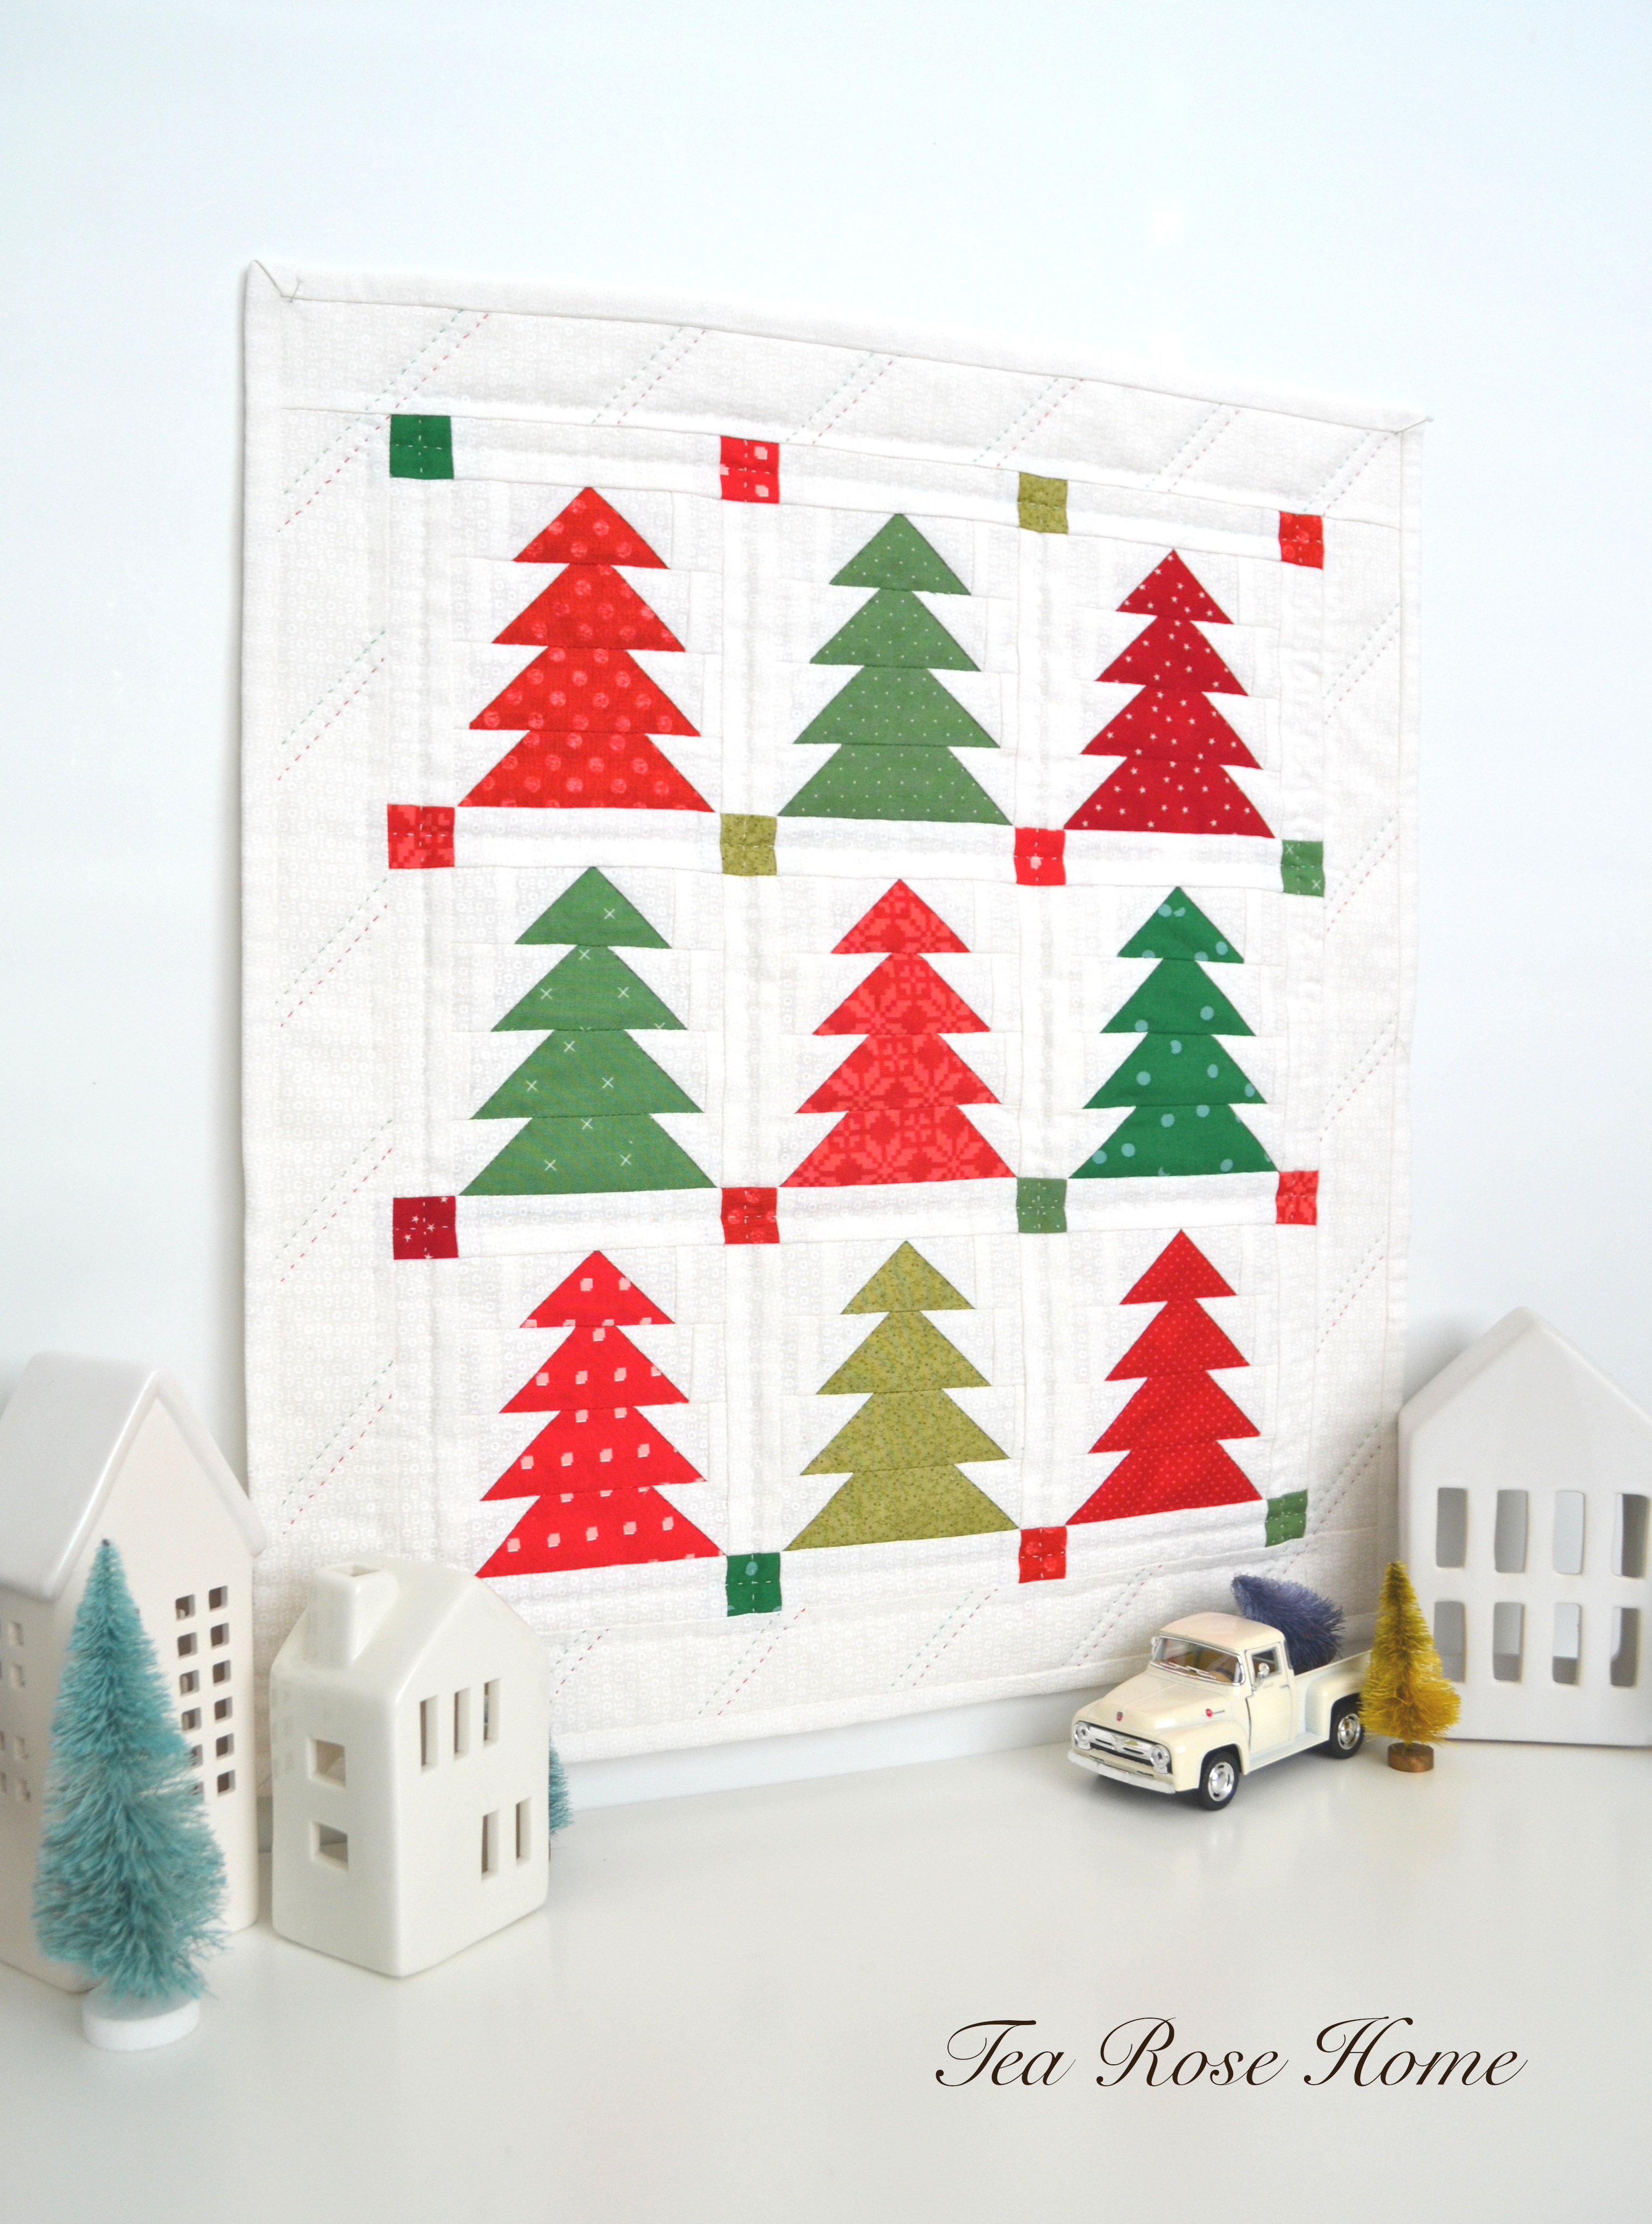
Christmas Tree Wall Hanging Tutorial

O Christmas tree, O Christmas tree... every year I see fun Christmas tree quilt ideas online and want to make one, but a year passes by so quickly and poof! It is already December. I tried coming up with my own pattern around October. I was sketching and experimenting with fabrics. After a few tries, I came up with this tree pattern. Wouldn't it be so pretty if I made 300 plus blocks and made a quilt with these cute trees? I was looking at several projects on my table and decided not to do that this year. Instead, I made a small wall hanging!

Cutting the fabric might be a little tedious, but once you get the hang of it, this project goes quickly. It is not too late to whip this up to be part of your Christmas decorations.

* YOU NEED

4 different kinds of green fabrics
5 different kinds of red fabrics
White fabric

* HOW TO

1. Cut fabrics. The picture shows the parts you need to construct a block and the measurements are written in the picture. I only listed the measurements on one side because it is symmetrical.
2. Start from the bottom row. Lay green fabric down right side up and lay white 1 ½" x 1 ½" square on both ends right side down. Draw a diagonal line and sew on the line. Trim the excess and open the white fabric. Press with iron.
3. For the rest of the three rows, repeat the same process and add extra rectangle pieces to the sides.
4. Sew all four rows together and trim the block. The block should be 4" x 4 ½". 8 more blocks to go!
5. Cut 24 pieces of 1 ¼" x 4" strips from white fabrics and 16 pieces of 1 ¼" x 1 ¼" squares from red and green fabrics. Piece the strips with the tree blocks as shown in the picture; make the rows first.
Then, make the "skinny rows" with the white strips and colored squares.
6. Piece the tree row and skinny row together. Press with iron.
7. From the white fabric, cut 2 pieces of 2" x 15 ½" for the side borders and cut 2 pieces of 2" x 17" for the top and the bottom borders. Sew them on, press with iron.
8. It is totally up to you on how you want to finish the quilt. I have been doing machine quilting on my last few quilts, so I decided to do hand quilting on this one. I used white, red and green thread. It was a lot of fun deciding which color to use where. One of my dream sewing machines is Sashiko from Babylock. I know; it is a one letter difference from my name. When I first glanced at the machine, I thought, "Wow! The machine has same name as me!" haha. Sashiko machine stitches are uniform and consistent, making it easier and faster to finish your quilting projects (there are many other ways to use this machine, too). You can achieve a hand quilted look with this machine! I LOVE doing hand quilting, but when I am older and it gets harder to hand quilt, there is still hope. :)
I hope you will have a wonderful holiday season. Thank you for visiting!

Thursday, June 30, 2022

My Mom's 70th Birthday ~ Purple Quilt

Before we can talk about the purple quilt, let me tell you a little bit about a red quilt I made 10 years ago... 10 years ago, when my mom turned 60 years old, to celebrate her special birthday, I made her a red quilt. There is an old tradition in Japan that when you celebrate your 60th birthday you wear a red vest and hat with your family and friends. My mom didn't want to wear them AT ALL, so I made her a red quilt instead. Even though I was born and raised in Japan, I had no clue about this tradition, how it started, and the meaning behind it. So I did a quick search and I wrote about that in my blog post 10 years ago, if you are interested, you can read it here.
During the research, I found out that there is a theme color for each decade and the color for 70 is purple. I told her that when she turns 70, I will make her a purple quilt. 10 years passed so quickly... and to tell you the truth, I had forgotten about the promise I made. One Sunday, I was facetiming with my mom and she was using the red quilt I made. Talk about divine timing!! I was thinking to myself "Thank you God SO MUCH!!" I definitely want to keep my promise to her. The last couple years were very hard for her and I wanted to do something special.

I made the red quilt with only solid fabrics to play with color gradients. For the purple quilt, I thought it would be fun to use prints and make it scrappy. I had most of the fabrics on my shelf, but I added some new ones to them. I used Half Square Triangles to create this quilt and I will show you how to make 8 of them very quickly. There are MANY tutorial posts and videos out there if you want to explore.

* Purple Quilt How to

Finished quilt size 64 1/2" x 80 1/2"

1. Cut 40 pieces of 9 3/4" x 9 3/4" squares from dark fabrics and 40 pieces of 9 3/4" x 9 3/4" squares form light fabrics.
2. Combine a dark and a light square, right sides together. Draw diagonal lines on the square.
3. Sew 1/4" seam on each side of each diagonal line. I had my 1/4" Quilting Foot with Guide on my Baby lock machine, so I just use that as a guide to sew 1/4" seam from the diagonal line. You could draw the lines next to the diagonal line before you sew too. Draw a vertical and a horizontal line in the middle of the square.
4. Cut in the middle of the sewed diagonal lines, on the vertical and horizontal lines to make 8 triangles.
5. Open them up and press them with an iron!
6. I didn't have a specific design idea in mind. After I made all the HSTs, I sat in front of my design wall and moved them around for a few days. I thought about doing a more unified look at first, but then I changed my mind to do a more scrappy look. I pieced squares first, then pieced them to make rows and sewed the rows together. Once I finished with the quilt top, I was going to take pictures and like always, my little dog came and joined the photoshoot. He was too cute to dismiss...
I machine quilted it myself, added the label and packaged it. Now the quilt is on its way to Japan and I hope my mom will receive it before her birthday. Happy Birthday, Mom!!
P.S. In case you are curious... The theme color for 80 is yellow. I normally don't use many yellow fabrics, but I better start thinking about what to do!

Tuesday, December 7, 2021

Babylock Decals

Look at these fun decals I received in the mail! Baby Lock came out with some decals to decorate your sewing machine with. They are also great to use on your laptops, phones, water bottles and much more. They are not available online, but you can find them at your nearest retailer so go check them out.

The decal that popped out to me is this one,
I went to New York City at the end of October, and I am kind of obsessed with New York right now... the design of this decal reminded me of the famous "I N.Y" sign. hahaha.

Several styles of packages are available. They will make a fun Christmas gift for Baby Lock sewing machine lovers!

Friday, May 7, 2021

Mother's Day Gift ~ Nova (Sapporo Coat)

You might be tired of me posting another Nova(Sapporo) Coat, so I apologize in advance. I made this third coat for my mom who is in Japan, for Mother's day and I shipped it last week. She called me today to tell me how much she loves it! I am so glad it got there in time.
I made the first coat with a white wool blend and the second coat was a quilted one. I knew my mom wouldn't care for either of them because she would say white will get dirty easily, the quilted coat is too bulky and the flower pattern is too much for her. We have very different styles and she prefers more simple and practical clothing. After thinking it over, I decided to make her coat with double gauze and gauze lining. Once it was done of course I had to try it on!
The coat is very light, soft and nice to the touch and I knew she would love the dusty blue. Rainy season will be starting soon in Japan and sometimes it gets chilly, even in June. I hope the jacket will provide the perfect warmth for her and that she will always feel that I care about her even from thousands of miles away. Happy mother's day, mom. :)

Thursday, April 29, 2021

Nova Coat Pattern + Rifle Paper Co. Fabric = New Favorite!

I think it was about two years ago that I purchased the Wildwood fabric by Rifle Paper Co. I love it so much that it was sitting on my table for a while and every time when I walked by, I looked at it, touched it and thought about what to make with it. A tunic, a top, a skirt??? I didn't want to mess it up or didn't want to regret not making something else after I used it. My indecisiveness was in full swing and I had to put it on the shelf and wait.

After I made Sapporo Coat (Nova coat now), I decided to use that fabric and try making a quilted coat. it was bit scary, but I was more excited since I set my heart on a project with Wildwood fabric.

Since I have to machine quilt each piece, it was more work for me, but I enjoyed the process. It was like taking myself on an adventure! I really had to see the finished quilted coat that I saw in my mind's eye. I had already decided what quilt design I should do and at what scale.

I would say that the most challenging thing in the whole process was to make sure that the patterns of flowers would line up nicely in the back, sides and on the sleeves. I laid the pattern pieces in different ways to make sure that they matched up nicely.

To be honest, I didn't even think this would be a challenge. If I thought about it in the beginning, I may not have chosen this fabric. If you are thinking about making a coat, and you are still new at this, I advise you to choose solid, or small patterned fabric, you don't have to stress about matching the pattern.
I am happy to say that the coat turned out exactly how I imagined!

I used a blue woven fabric for the lining and I like how it is softer than quilted cotton. The coat is bulkier than the wool coat I made, especially around the armholes, so I wanted to use something less stiff.
The flower border lined up nicely at the pocket and the sides as well. Yes!
It is getting warmer, but there are still cold mornings and evenings where I live. I think I have few more weeks to enjoy this jacket, until I will put it away 'til fall (then I have something to look forward to!). I took the jacket for a test drive.
I absolutely LOVE how it turned out. I would love to do patchwork piecing with small pieces next time when I make a quilted jacket. Don't you think there are many possibilities for the patterns and colors?

Thursday, September 17, 2020

Kaffe Fassett Shot Cotton Blouse & Skirt

I must say that my most favorite material to sew is hands down, cotton. Maybe because I am a quilter too, and I am more familiar with the material; better than any other fabrics. Also, I wear cotton dresses like this daily even when I am just staying home. Some people might think I am over dressed and being funny, but to me, I feel comfortable in them and they are all washable! I found this dark navy and blue stripe shot cotton by Kaffe Fassett at a local store and immediately fell in love with it. I was going back and forth trying to decide whether I should make a dress or separates. It looks like a dress, but it is actually a blouse and a skirt!

I just used a pattern from one of my posts Liberty of London Top & Skirt for the skirt. Revised a little to make it into an elastic waist instead of a zipper. For the top, I used Esme Top pattern from Lotta Jansdotter Everyday Style. I used this pattern to make a tunic a long time ago, but I really like the fit and I thought this would make a lovely top to go with the skirt. Speaking of the skirt, I even lined it! Fun thing is that I can wear this top and skirt together like a dress or separately. I know I will have fun fishing things from my closet to coordinate. :)

What is your favorite material to sew with and why? I would like to get out of my comfort zone and try new things during this sew my stash challenge, there are some sitting in my closet... I guess I will get my hands on them when I run out cotton (or maybe sooner!).
Blog Widget by LinkWithin