


Showing posts with label Babylock ambassador. Show all posts
Showing posts with label Babylock ambassador. Show all posts
Tuesday, August 6, 2024
Wensleydale Quilt for My Son

 I am normally drawn to floral patterns and bright colors, but I really enjoyed going through my stash to look for different types of patterns and colors. After I pieced them all, I decided to hand quilt it and started the process. Then...

Tuesday, January 10, 2023
Scrappy Strip/String Quilt


A. Ask someone with a longarm to quilt it for me.
B. Quilt it myself with my machine. I am not that good at it, but it will be good practice.
C. Hand quilt it.
I tossed and turned... well, maybe not that much, but I finally decided to hand quilt it with thick thread and big stitches. I was second guessing myself while I was working on it, but I actually love how it turned out!


Thursday, December 1, 2022
Christmas Tree Wall Hanging Tutorial
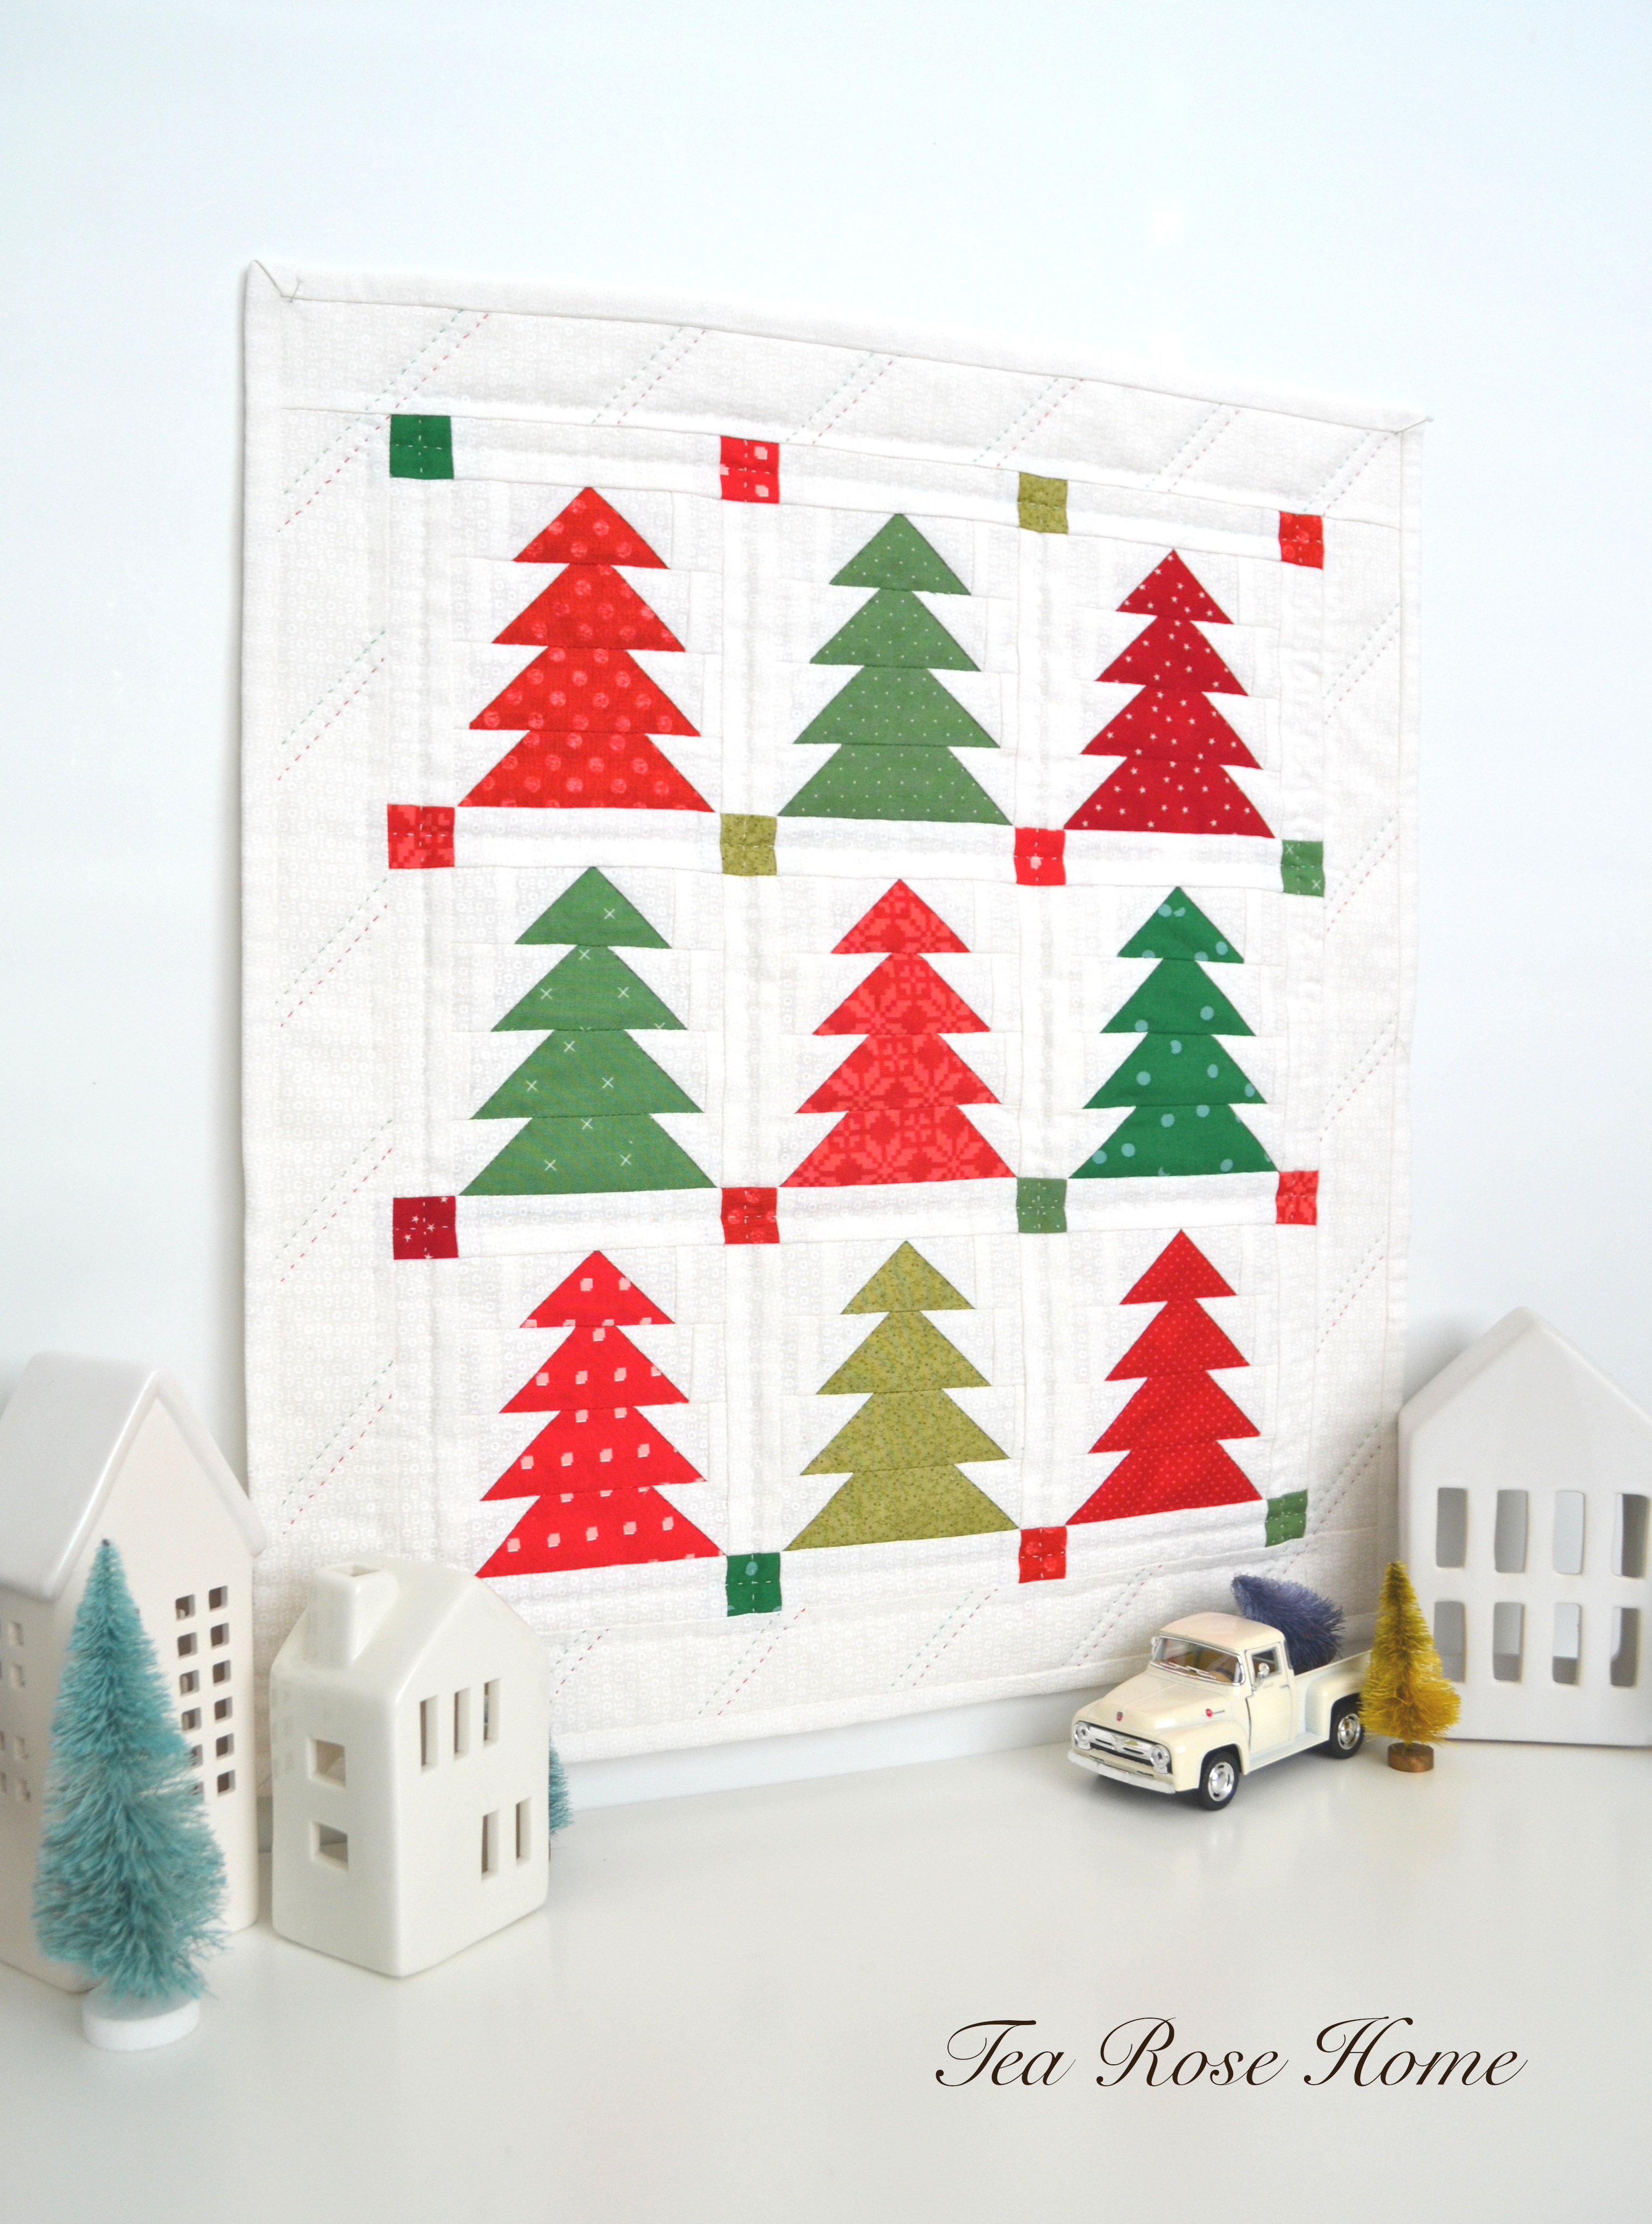
Cutting the fabric might be a little tedious, but once you get the hang of it, this project goes quickly. It is not too late to whip this up to be part of your Christmas decorations.
* YOU NEED
4 different kinds of green fabrics
5 different kinds of red fabrics
White fabric
* HOW TO
1. Cut fabrics. The picture shows the parts you need to construct a block and the measurements are written in the picture. I only listed the measurements on one side because it is symmetrical.


Tuesday, December 7, 2021
Babylock Decals

The decal that popped out to me is this one,

Several styles of packages are available. They will make a fun Christmas gift for Baby Lock sewing machine lovers!
Thursday, September 30, 2021
McCall's 8044 Skirt with Linen


Tuesday, September 14, 2021
A New Dress from Casual Chic Clothes/ きれいめカジュアル服


Wednesday, August 25, 2021
Red Heart Quilt for My Friend

When I went through breast cancer three years ago, I was gifted with a special pink heart quilt from a talented group of friends. I was so surprised and touched with everyone's generosity and every time I wrap myself in it I feel so loved. It is one of my prized possessions still to this day and it will be for a long long time.
That is where I got the idea to make a quilt, but instead of pink, I decided to make a red heart quilt.


Thursday, April 29, 2021
Nova Coat Pattern + Rifle Paper Co. Fabric = New Favorite!

After I made Sapporo Coat (Nova coat now), I decided to use that fabric and try making a quilted coat. it was bit scary, but I was more excited since I set my heart on a project with Wildwood fabric.
Since I have to machine quilt each piece, it was more work for me, but I enjoyed the process. It was like taking myself on an adventure! I really had to see the finished quilted coat that I saw in my mind's eye. I had already decided what quilt design I should do and at what scale.
I would say that the most challenging thing in the whole process was to make sure that the patterns of flowers would line up nicely in the back, sides and on the sleeves. I laid the pattern pieces in different ways to make sure that they matched up nicely.
To be honest, I didn't even think this would be a challenge. If I thought about it in the beginning, I may not have chosen this fabric. If you are thinking about making a coat, and you are still new at this, I advise you to choose solid, or small patterned fabric, you don't have to stress about matching the pattern.

I used a blue woven fabric for the lining and I like how it is softer than quilted cotton. The coat is bulkier than the wool coat I made, especially around the armholes, so I wanted to use something less stiff.


Monday, October 5, 2020
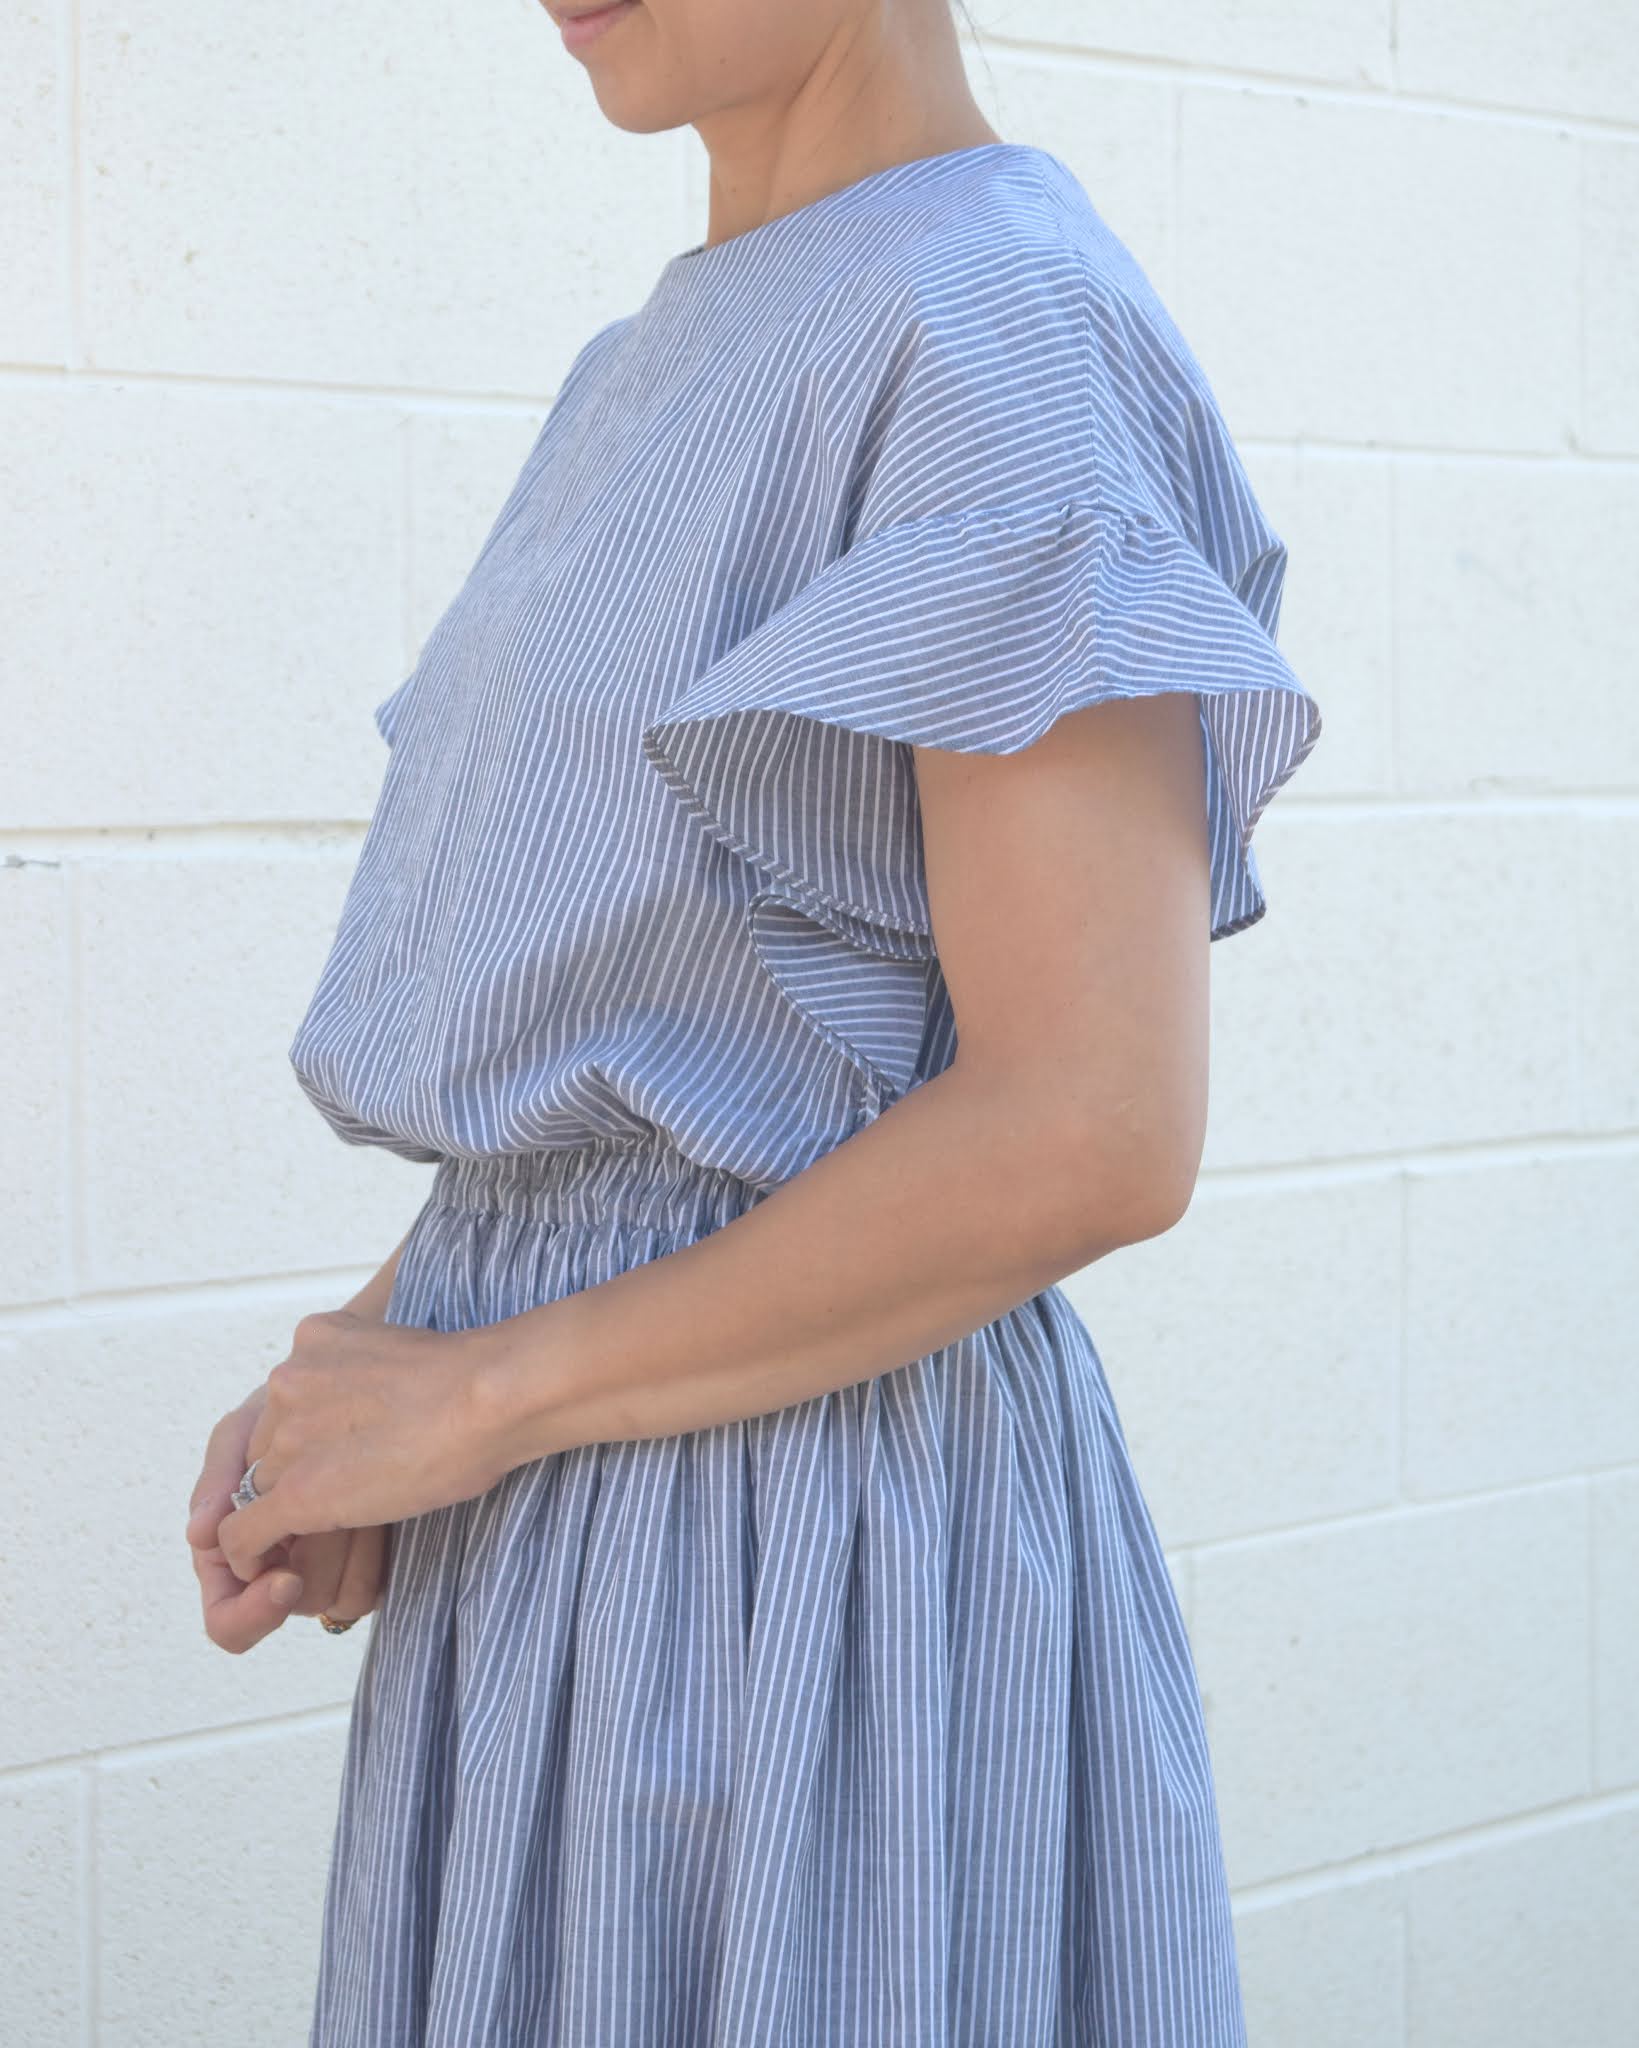
Light Weight Denim Dress with Simplicity 8910/R10183

I had this light weight denim forever and there were a few times in the past that I almost sewed something with it and then changed my mind. When I had Simplicity pattern 8910 in my hand and was revisiting my stash, I felt like they were a great match. There are many reasons why I adore the design of this dress pattern. I love the simple shoulder with modest puff on the sleeves little above the wrists. I also love the thick pleats in the front and the back. I feel like these pleats have a slimming effect compared to other similar dresses. Another aspect I love is these unique slash pockets and how they compliment the pleats nicely. The only change I made for this pattern is that I brought the neckline up higher.


After I tried on the finished dress, I realized that I wanted the top portion of the dress slightly shorter; if I am going to make this dress again in the future. You see, I have a short torso and long arms. That is why I normally don't buy petite clothing even though I am a short girl. The sleeves will be too short for me. One of the greatest aspects of sewing your own garments is that you have some control over how the clothing fits you. I already made an adjustment to the pattern and made the top front/back 1/2" shorter.

The air is getting cooler, so I decided to do a fall coordination with a shawl. Because of the nature of the fabric, I feel like I could wear this dress pretty much all year round. I also think that my daughter might even be willing to wear a shorter version of this dress if I sew her one.

Subscribe to:
Posts
(
Atom
)

