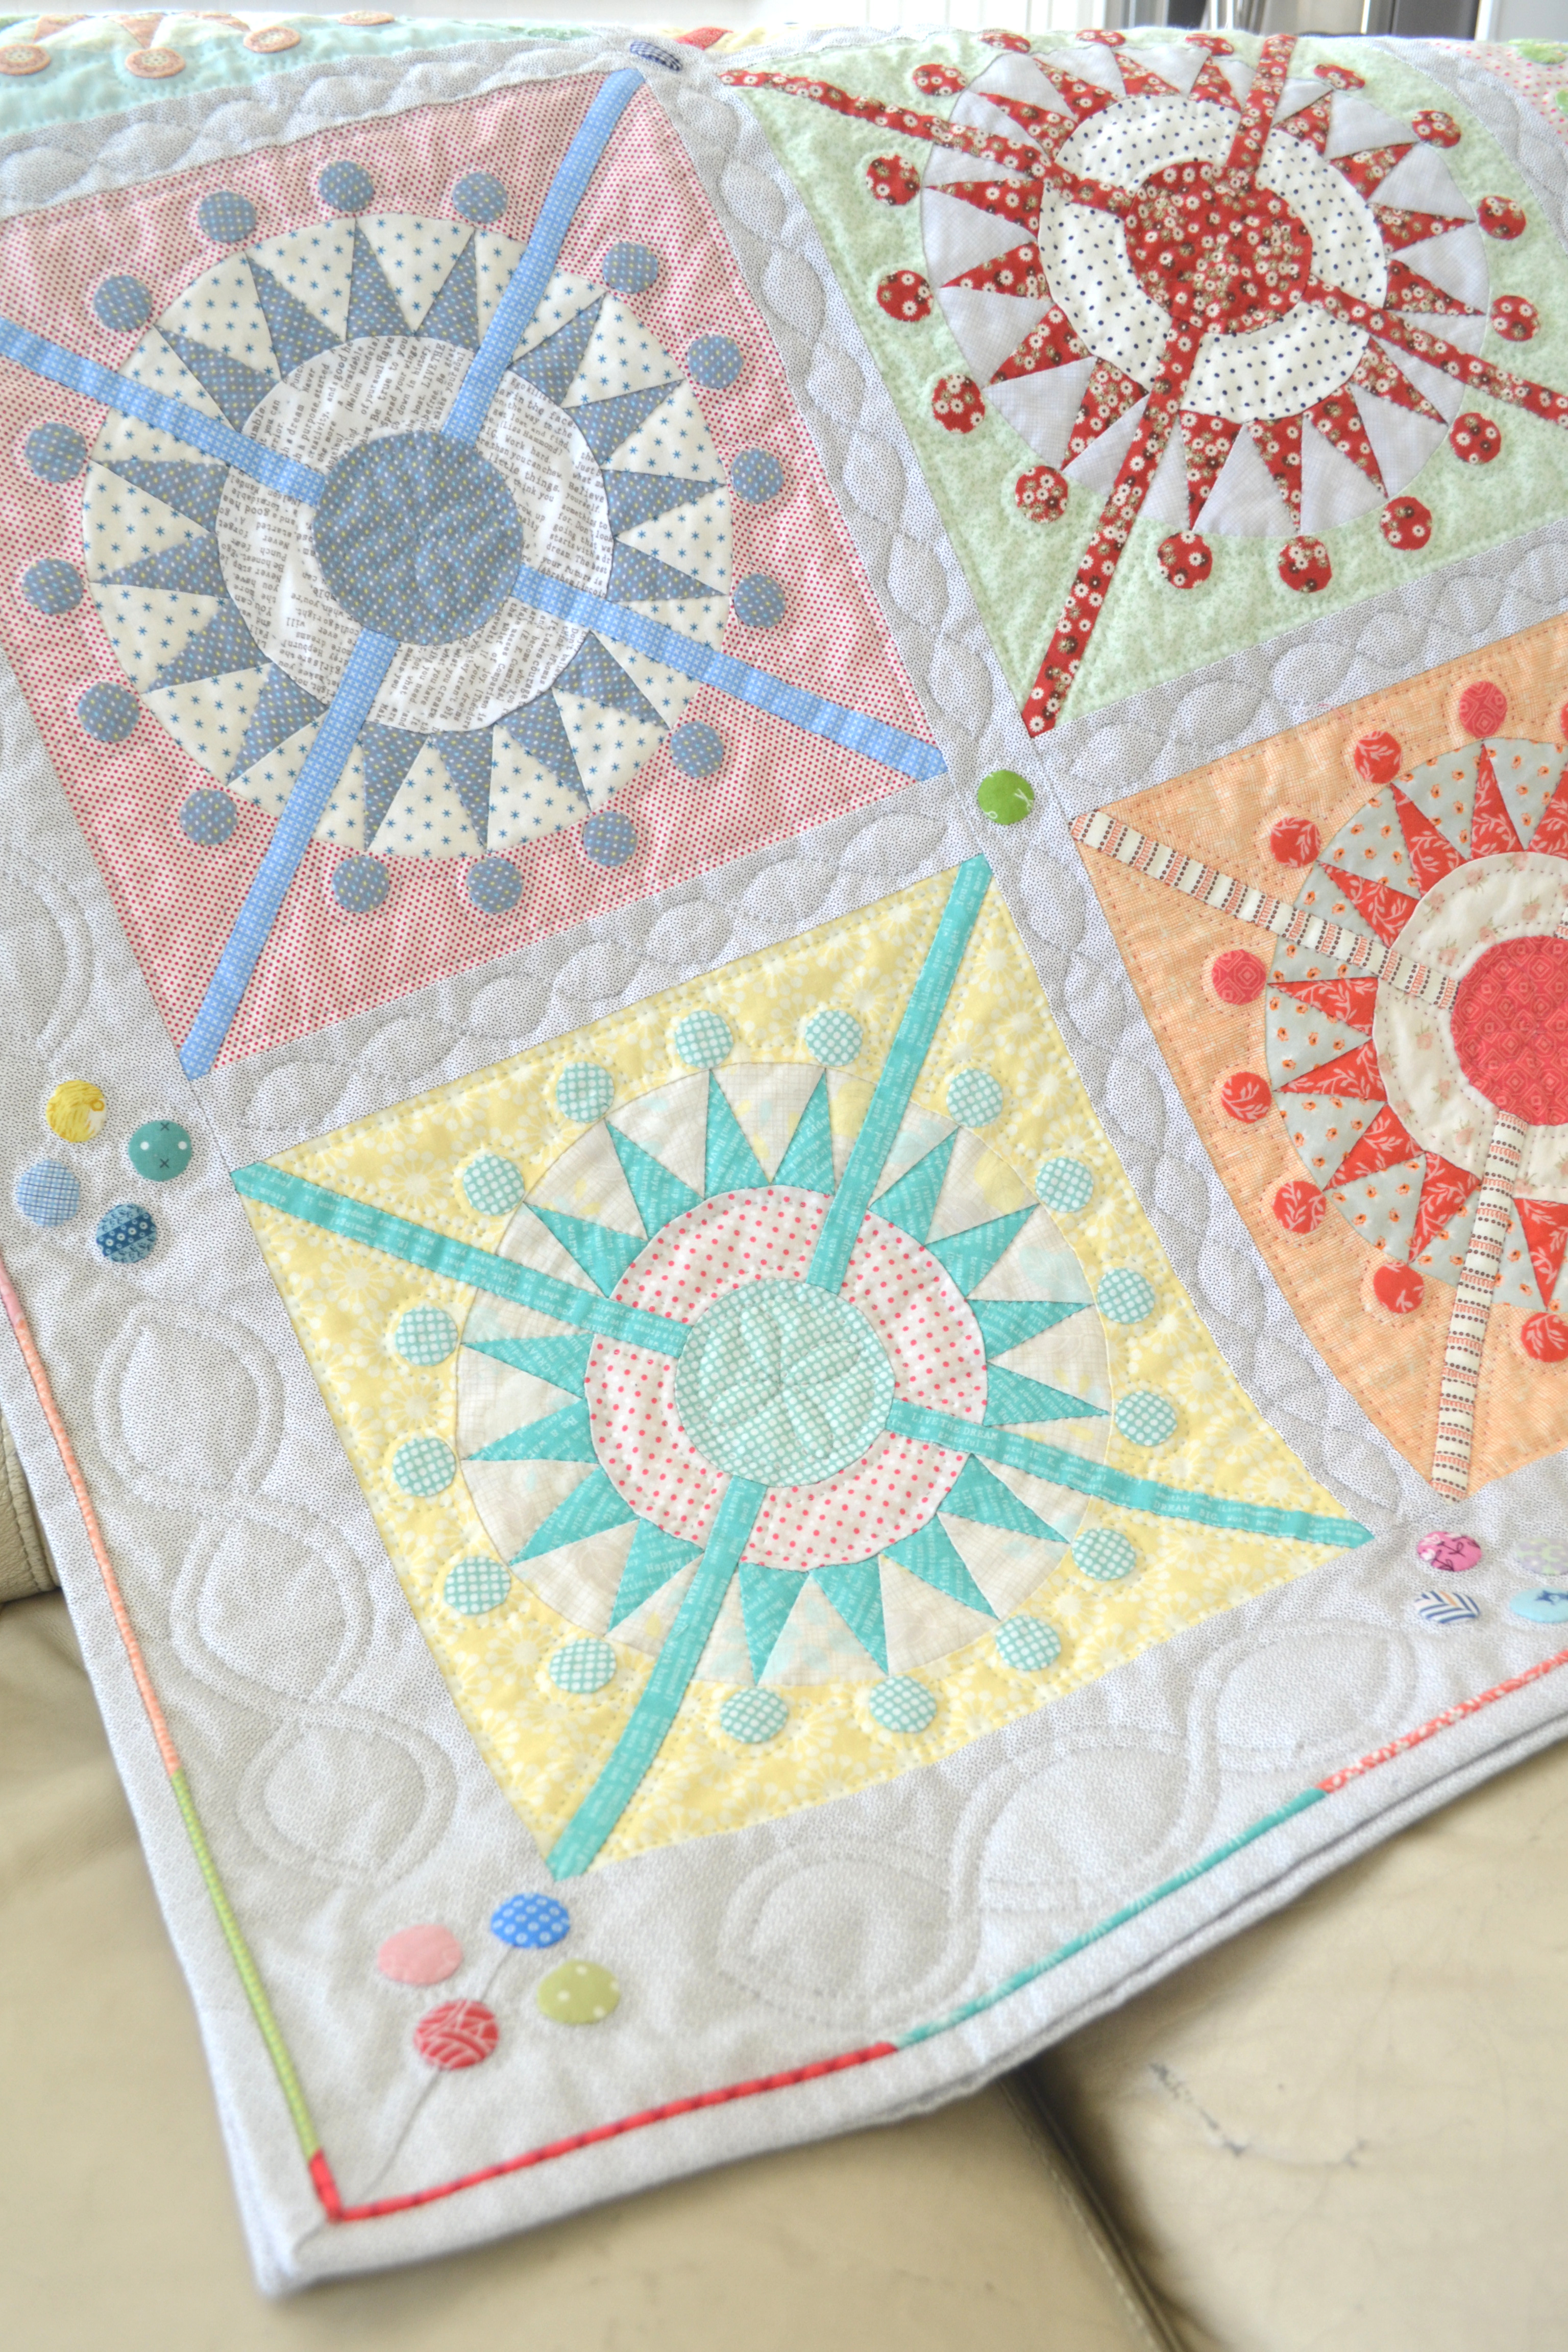
I decided to make a quilt with just the blocks that I love so much, instead of combining them with other blocks like in the original design. The blocks are all hand pieced and appliqued, but I used my baby lock sewing machine to sew the blocks, borders and sashing together. After hand quilting it, I thought about how I wanted to finish the quilt... should I do a simple binding? I put so much time and effort so far, I wanted to do something very special to finish off the quilt. I decided to add piping!
I have made/used piping for a small project such as pillows and pouches, but I have never done it for a quilt. I was not 100% confident in my abilities to do it, but there is a first time for everything, right? I will share what I did with you.
* You Will Need
Cord of your preference
Fabric strips
Clear thread and regular thread
Zipper foot
* How to
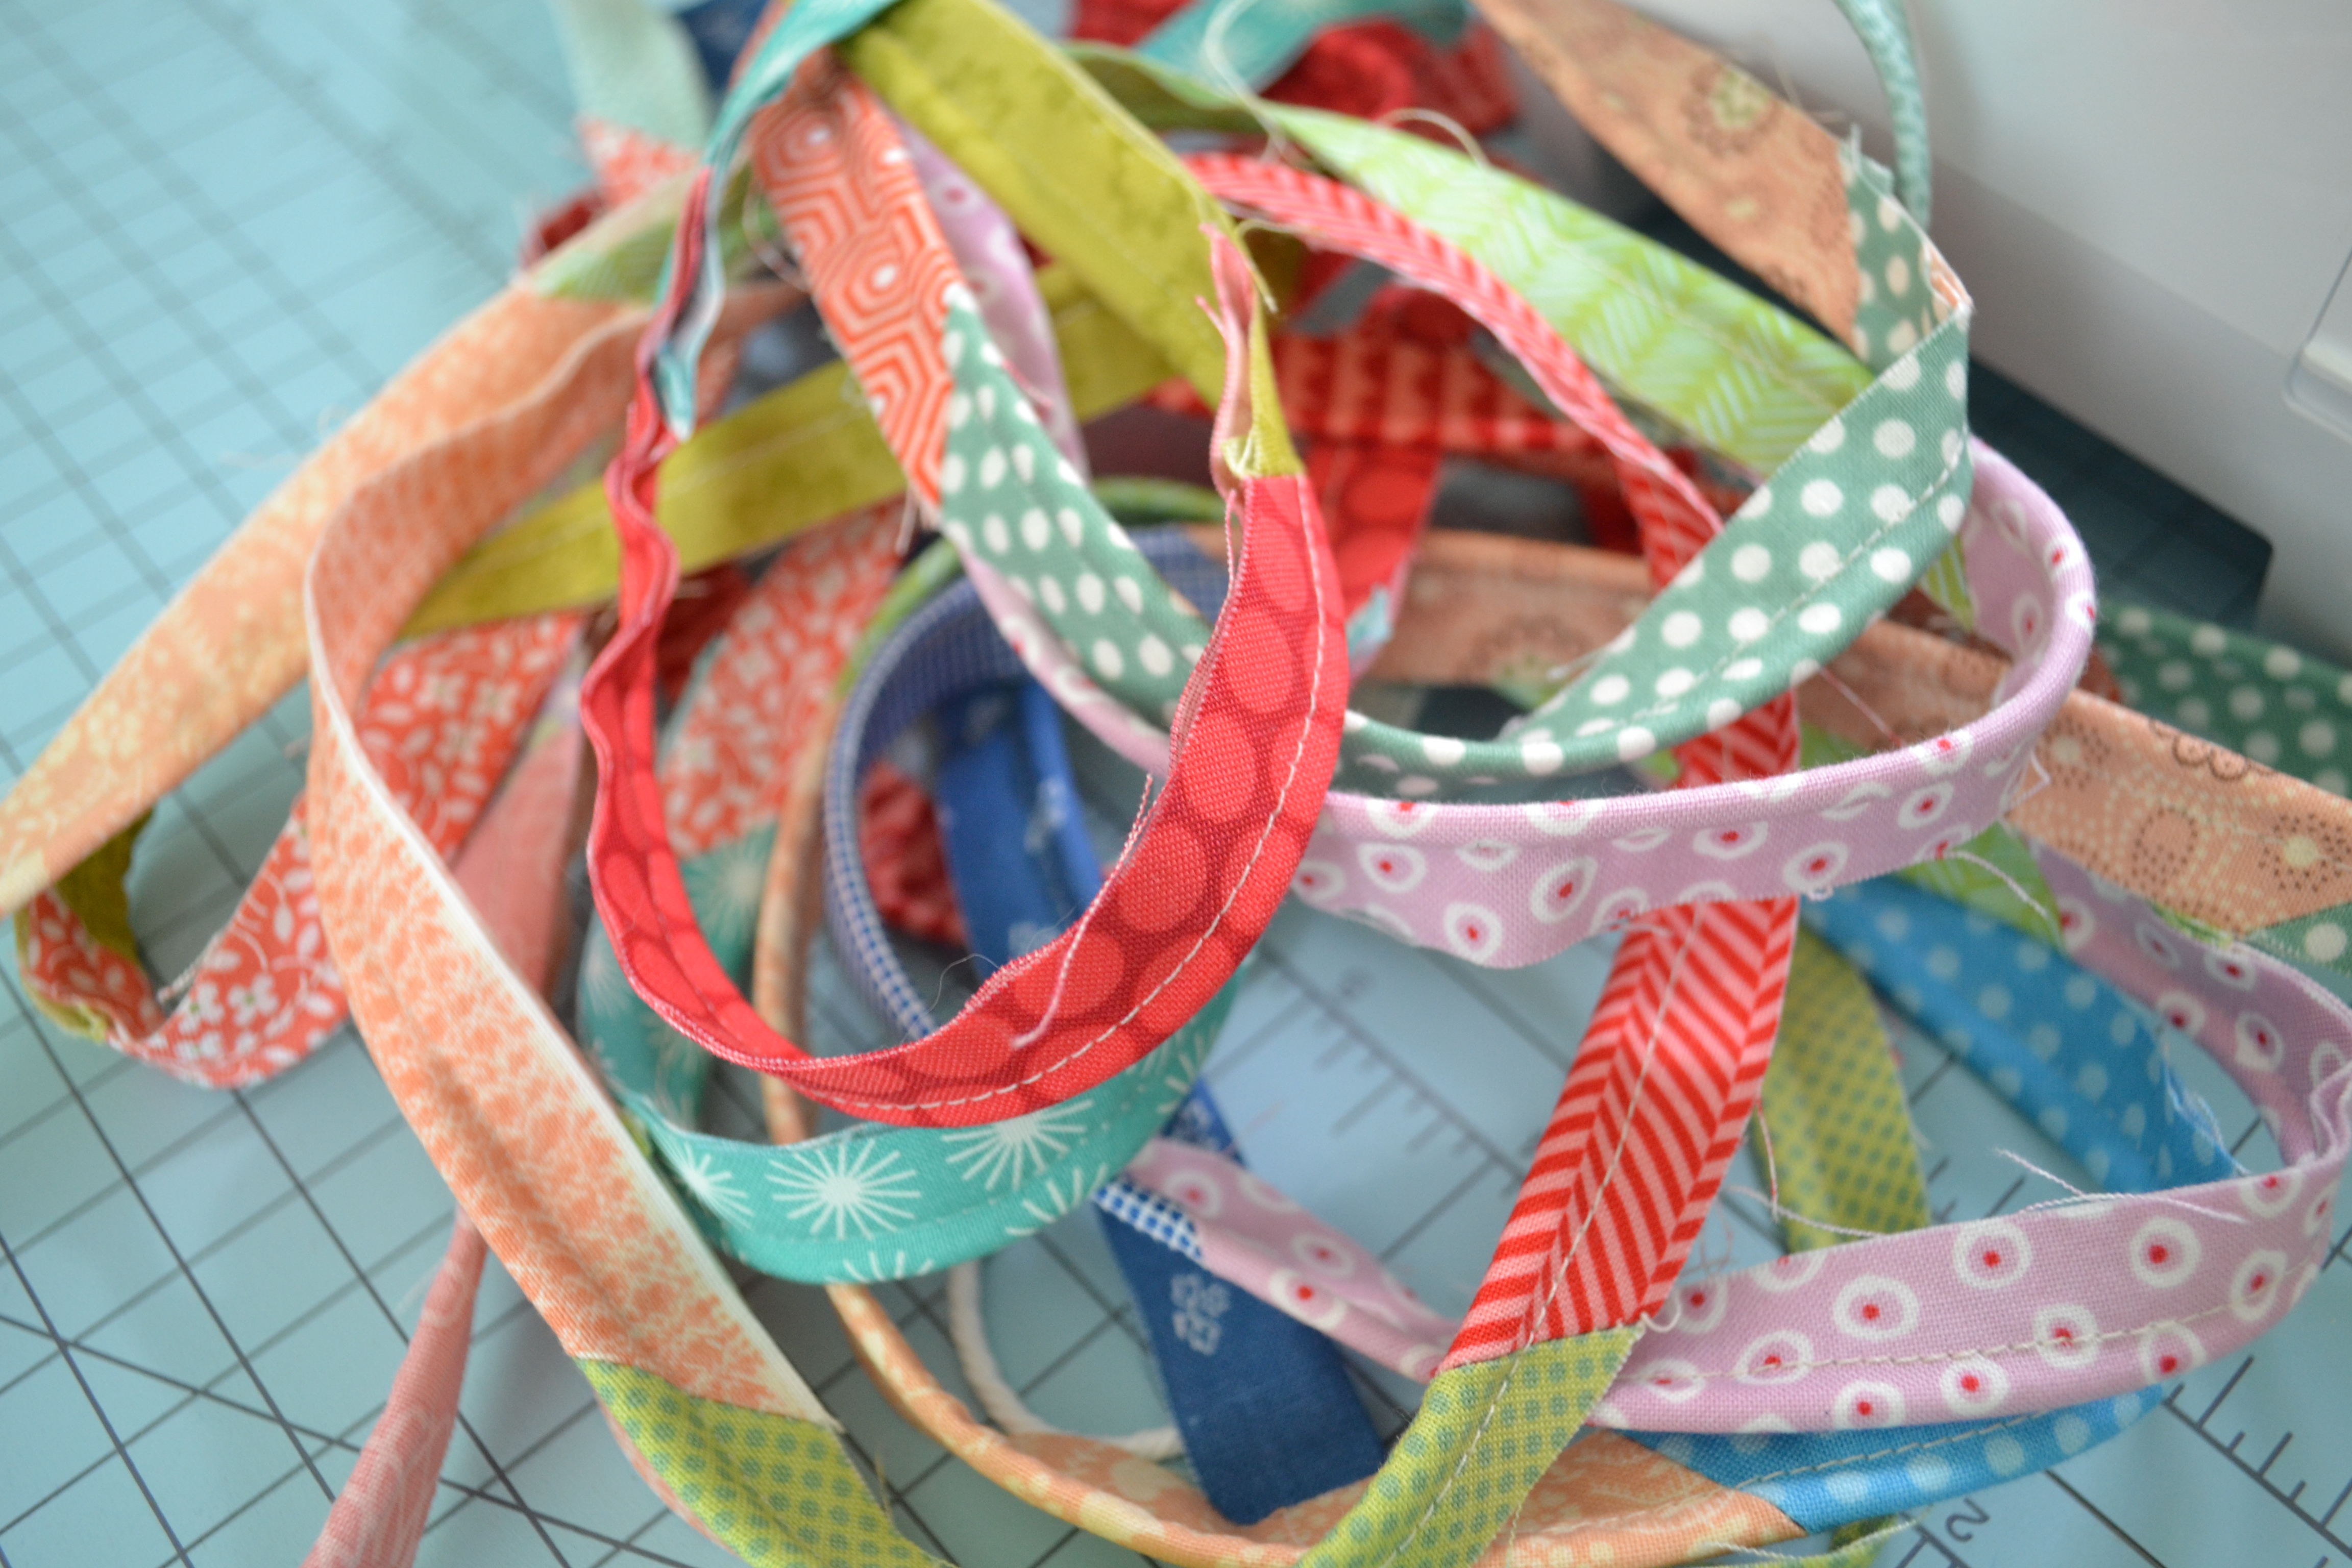
1. I wanted very thin piping, so I bought Dritz's 3/32" cable cord. Then I cut 1 1/4" wide fabric strips from the same fabrics I used in the quilting. You could make the piping from just one fabric, but I was going for a scrappy look for the piping as well. It is a little more work, I knew it would be worth it. I prefer the fabric strips that are cut in bias for binding, but I didn't have enough fabrics. I just cut them with the grain and mitered the ends. I pieced them together long enough to go around the whole quilt.
2. After I pieced the strips, opened the seams and pressed, I folded the fabric strip in half and very LIGHTLY ironed it to just leave a half line mark. The reason for this is that it is easier for me to keep the cord in the middle lining up with the folded line while I sewed the cord in, at the same time keeping the seams lined up nicely together.
3. Attach the Zipper foot to your machine. The zipper foot is one of the feet I use most often. I use it for inserting zippers, snap tape, attaching piping and decorative cording. When you sew, don't sew right up against the cord. It is better to have some "give" when you are sewing the piping to your project.


7. I like finishing my binding by hand using blind stitch. It is calming to sit and do hand work, at the same time I enjoy feeling anticipation of seeing the finished quilt soon!