


Showing posts with label quilt. Show all posts
Showing posts with label quilt. Show all posts
Wednesday, March 26, 2025
Nightingale Quilt Completed and Gifted
Wednesday, September 25, 2024
North Star Wedding Quilt


 Aren't they so cute?!
Lastly, the quilt label I created in the back of the quilt reads:
Love is like the North Star. In a changing world, it's always constant. - Gorden B. Hinkley
May your life be filled with love and happiness.- Mom
Aren't they so cute?!
Lastly, the quilt label I created in the back of the quilt reads:
Love is like the North Star. In a changing world, it's always constant. - Gorden B. Hinkley
May your life be filled with love and happiness.- Mom
Tuesday, August 6, 2024
Wensleydale Quilt for My Son


 I am normally drawn to floral patterns and bright colors, but I really enjoyed going through my stash to look for different types of patterns and colors. After I pieced them all, I decided to hand quilt it and started the process. Then...

Wednesday, July 17, 2024
Jen Kingwell Halo Quilt Finished!


Tuesday, April 23, 2024
First Time Ever Podcast Interview! ~ with Creative Japan
 Emi of Emi & Ko Studio reached out to me a while ago to be a guest on her brand new podcast. To be honest, my initial thought was to decline, because I am usually terrified of public speaking and am insecure about speaking English as a second language. But, I thought to myself, "When am I going to have such an opportunity to try something like this?" It was a bit scary but exciting at the same time! Big thanks to Emi who made me feel very welcomed and I felt it was more like having a conversation rather than an interview. Surprised to say, I had a great time!

Tuesday, November 7, 2023
Kantha Inspired Quilt with Sashiko Machine

Have you ever heard of Kantha? Kantha means "Patched cloth" and is a type of embroidery performed in the eastern regions of India and Bangladesh. It is often used to make simple quilts with a mix of old saris and other discarded pieces of fabric. The rich history of Kantha traces back to centuries ago! I have a Kantha quilt I purchased years ago and what I love about it is the bright colors and big stitches running through the quilt. Kantha does not have batting in them, but it is very soft and perfect for summer nights. The art of Kantha reminds me of Sashiko, which also has a very rich history of its own as a type of traditional Japanese embroidery or stitching used for the decorative and/or functional reinforcement of cloth and clothing.
Kantha and Sashiko were both created by people who were trying to be frugal; repurposing the old cloth, but at the same time those women created something beautiful to enrich their lives.
I marvel at how the human brain works and makes us innovative. India (and other parts of east asia) and Japan are separated by sea over thousands of miles. There was no TV, books, or internet to know these things centuries ago, but somehow we have similar beautiful crafts. Isn't that interesting?
I always wanted to make a Kantha quilt, but I have so many other projects I want to work on. I thought why not use modern technology (meaning my Baby Lock Sashiko machine to create a Kantha inspired quilt!
I have a stash of beautiful fabrics (Amy Butler, Heather Bailey, Tula Pink and Sandi Hendersen!) but some of them are big scale fabrics and kind of difficult to incorporate to some quilt projects. I love the fabric design so much that I hate to cut them into small pieces and lose their original beauty. You should see me in my sewing room pulling them out, admiring them, petting them and putting them back on my shelf. Haha. I bet many of you have the same problem as me. I know that this project is perfect for those fabrics waiting to be used and shine!
* You will need ~ finished quilt size 63"x 75"
Several large scale fabrics with bold colors and designs, Several fat quarters and cut by the yard fabrics
Batting ~ Actual Kantha quilt doesn't have batting, I decided to use batting
Fabrics for backing ~ I pieced my fabrics for backing
Thread for piecing and quilting
* How to
1. Some of you may not want to hear this, but to piece this quilt, I just went with the flow. To start off, I cut several of my fat quarters in half to create rectangles and lay them out on the floor to see the placement of the colors and scale balance. The wider rectangles are about the width of the fabric which is about 42" to 44"wide. They are about 7" to 17" high. I pieced narrow columns and wide columns separately, then pieced the two columns together.
2. Baste the top, batting and backing together. I wanted to use the Sashiko machine, so I went with pin basting. If you are machine quilting with your regular sewing machine, this step is the same. If you are hand quilting, I recommend hand basting the quilt with large stitches.

3. I set both the stitch length and stitch spacing to 5 on my Sashiko.

4. I used 4 different colors of Aurifil threads. I love Aurifil threads for quilting, they don't break like my other threads and I can always depend on them. The space between the quilting is 5/8".

5. Cut the excess.

6. Sew bias tape around the quilt. I normally sew the bias by machine and hand sew in the back, but I finished it off with the machine this time.

Time to enjoy!

I pieced the backing.

I love looking at gorgeous stitchings


Now the Kantha inspired quilt is all ready to be enjoyed. It is almost winter, but I love bright colors and bold floral design. I could imagine myself, wrapped up in this quilt with good books in front of the fireplace and dreaming of a warm spring day.
Wednesday, February 22, 2023
Dresden Plate Quilt from the Past

Why is the title "Dresden Plate Quilt from the past"; you might ask? I actually started making this quilt over 22 years ago. Sometime in my 2nd or 3rd trimester of my first pregnancy, for some reason, I thought I was going to have a baby girl. Please don't ask me why, I don't even remember. I jumped into this quilt project and appliqued all the main blocks and pieced them. Then at my ultrasound, I found out that I was being blessed with a boy! I put away the quilt top deep into my craft bin and forgot about it. I made lots of boy quilts for my boys and time went by... every time we moved, I would reencountered the unfinished quilt top, but then I would put it away again. A couple years ago, I had an impression that I needed to finish all the projects I started in the past; well, I have no strict time limits, but I decided that I shouldn't neglect them anymore. I pulled out this quilt top and designed the whole border applique and worked on it.
It was a lot of work, but I love how it turned out!
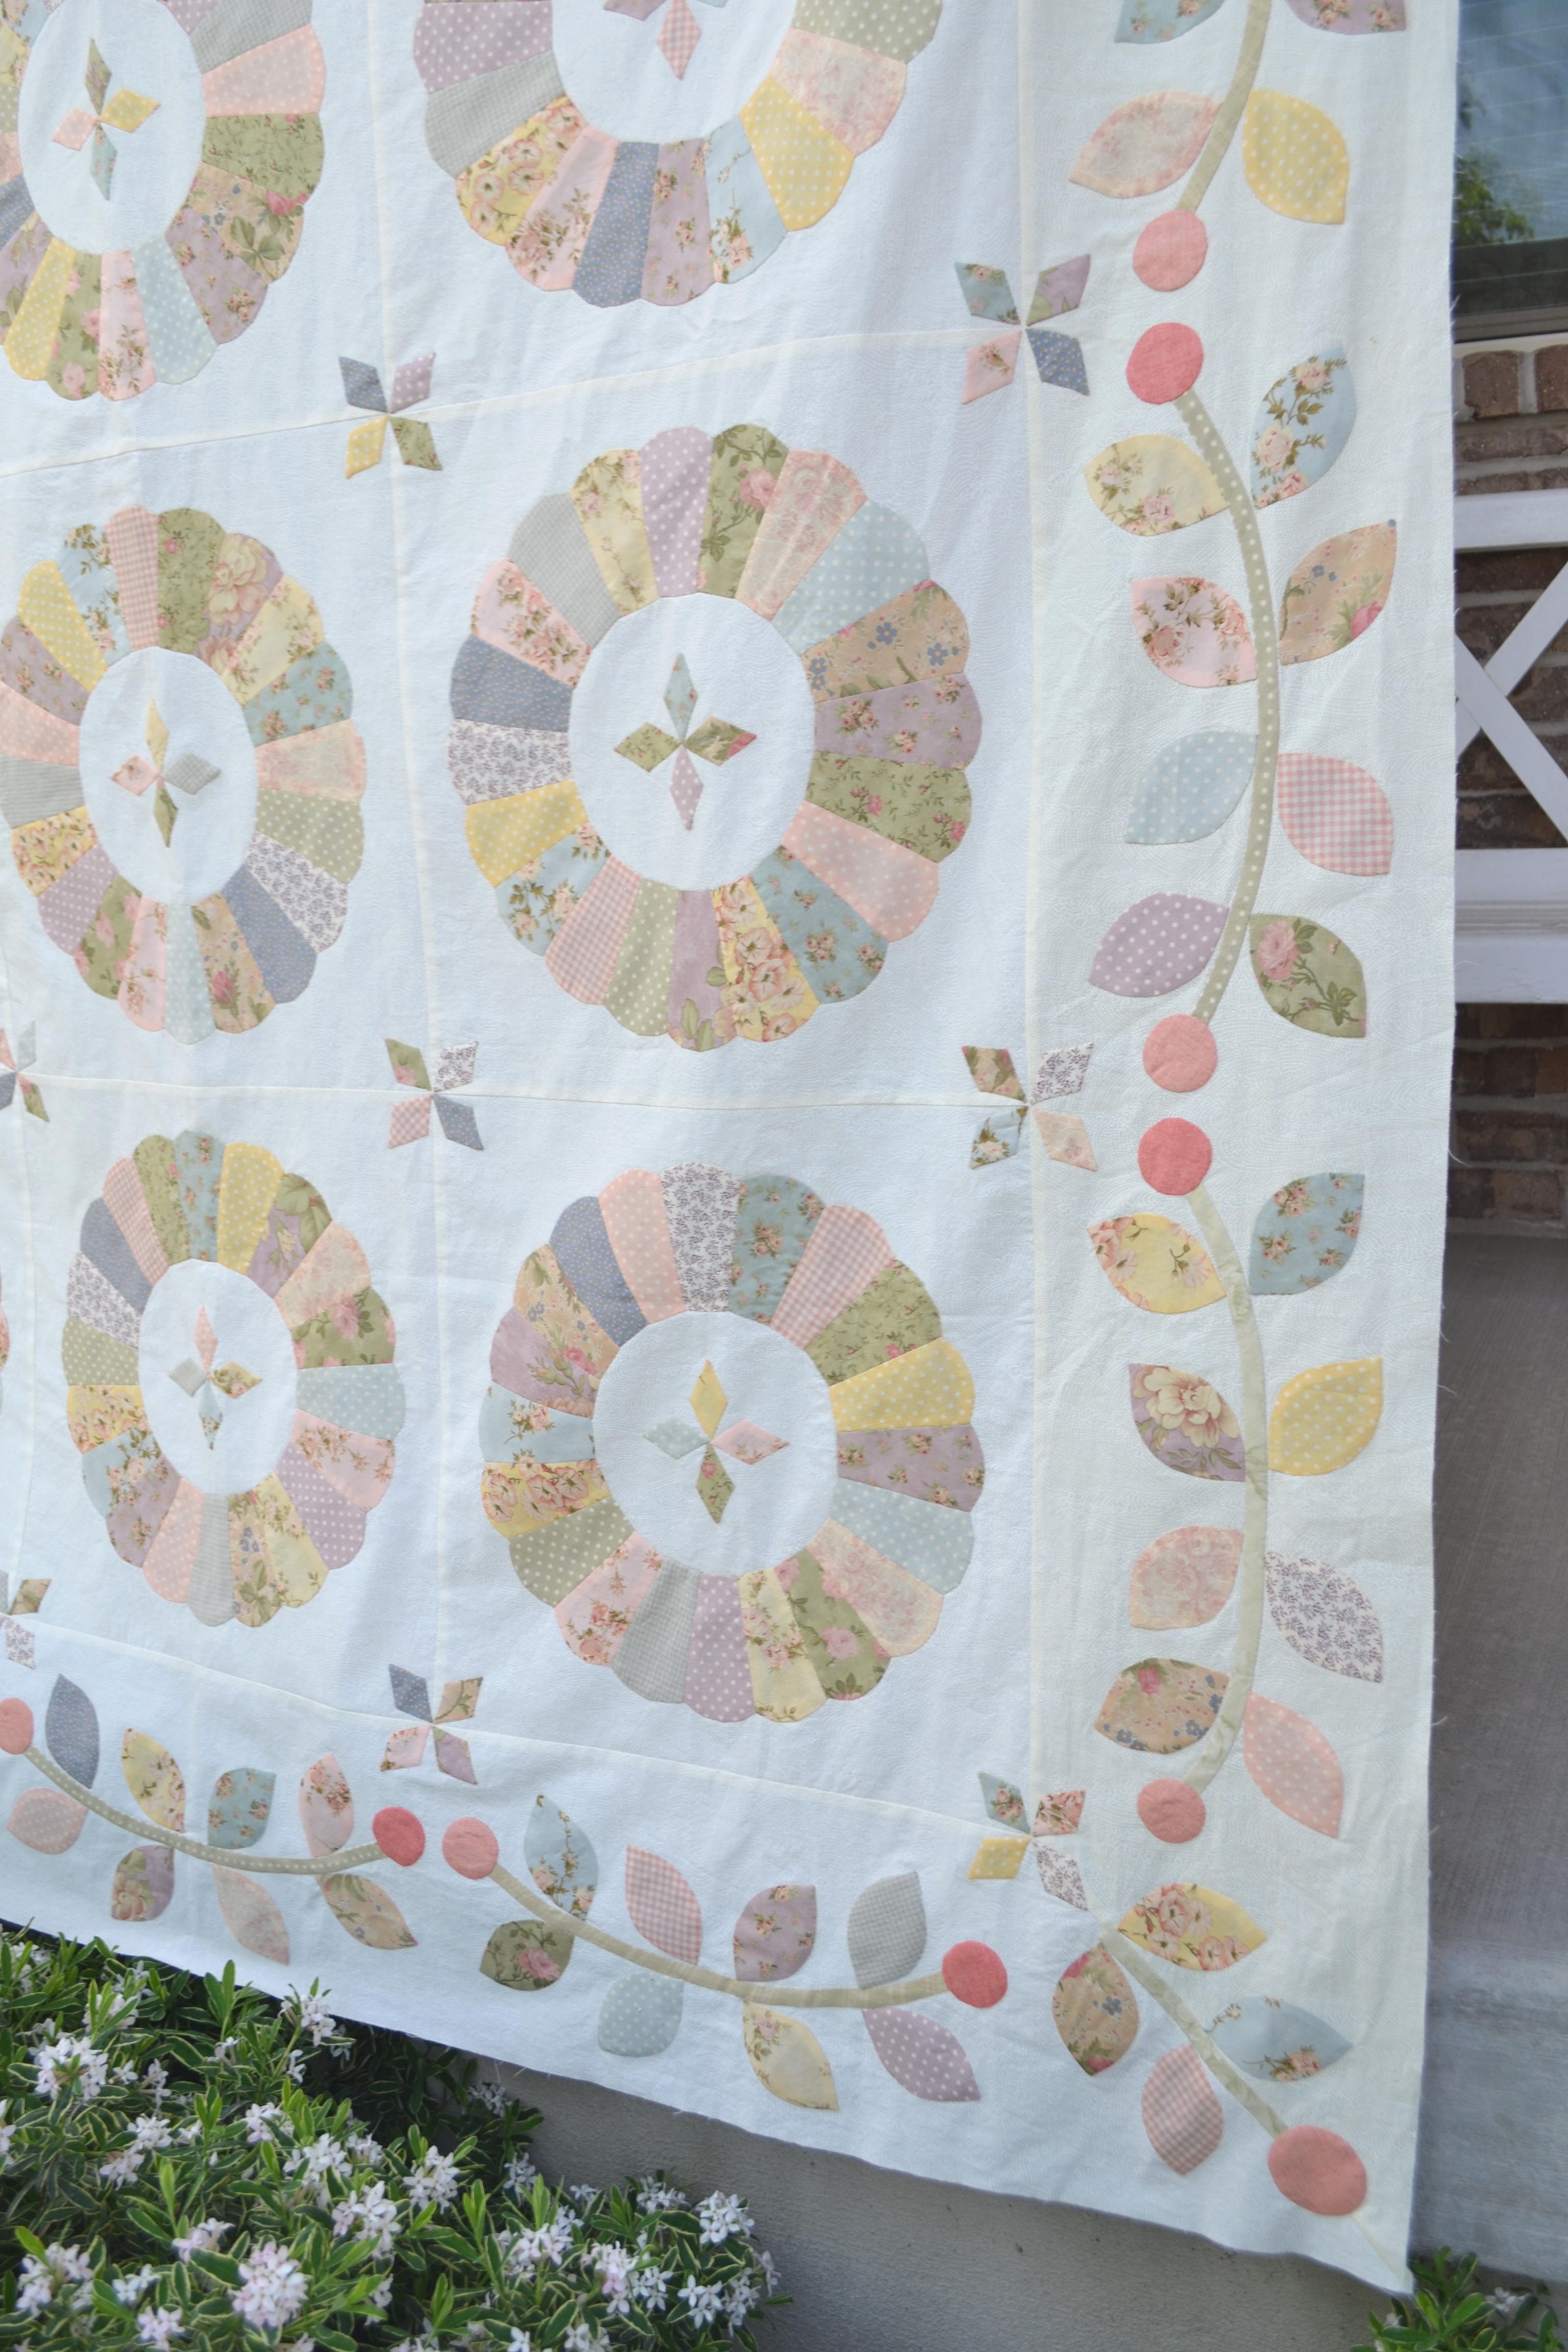
It is never too late to finish a quilt from the past.
Tuesday, January 10, 2023
Scrappy Strip/String Quilt


A. Ask someone with a longarm to quilt it for me.
B. Quilt it myself with my machine. I am not that good at it, but it will be good practice.
C. Hand quilt it.
I tossed and turned... well, maybe not that much, but I finally decided to hand quilt it with thick thread and big stitches. I was second guessing myself while I was working on it, but I actually love how it turned out!


Thursday, December 1, 2022
Christmas Tree Wall Hanging Tutorial
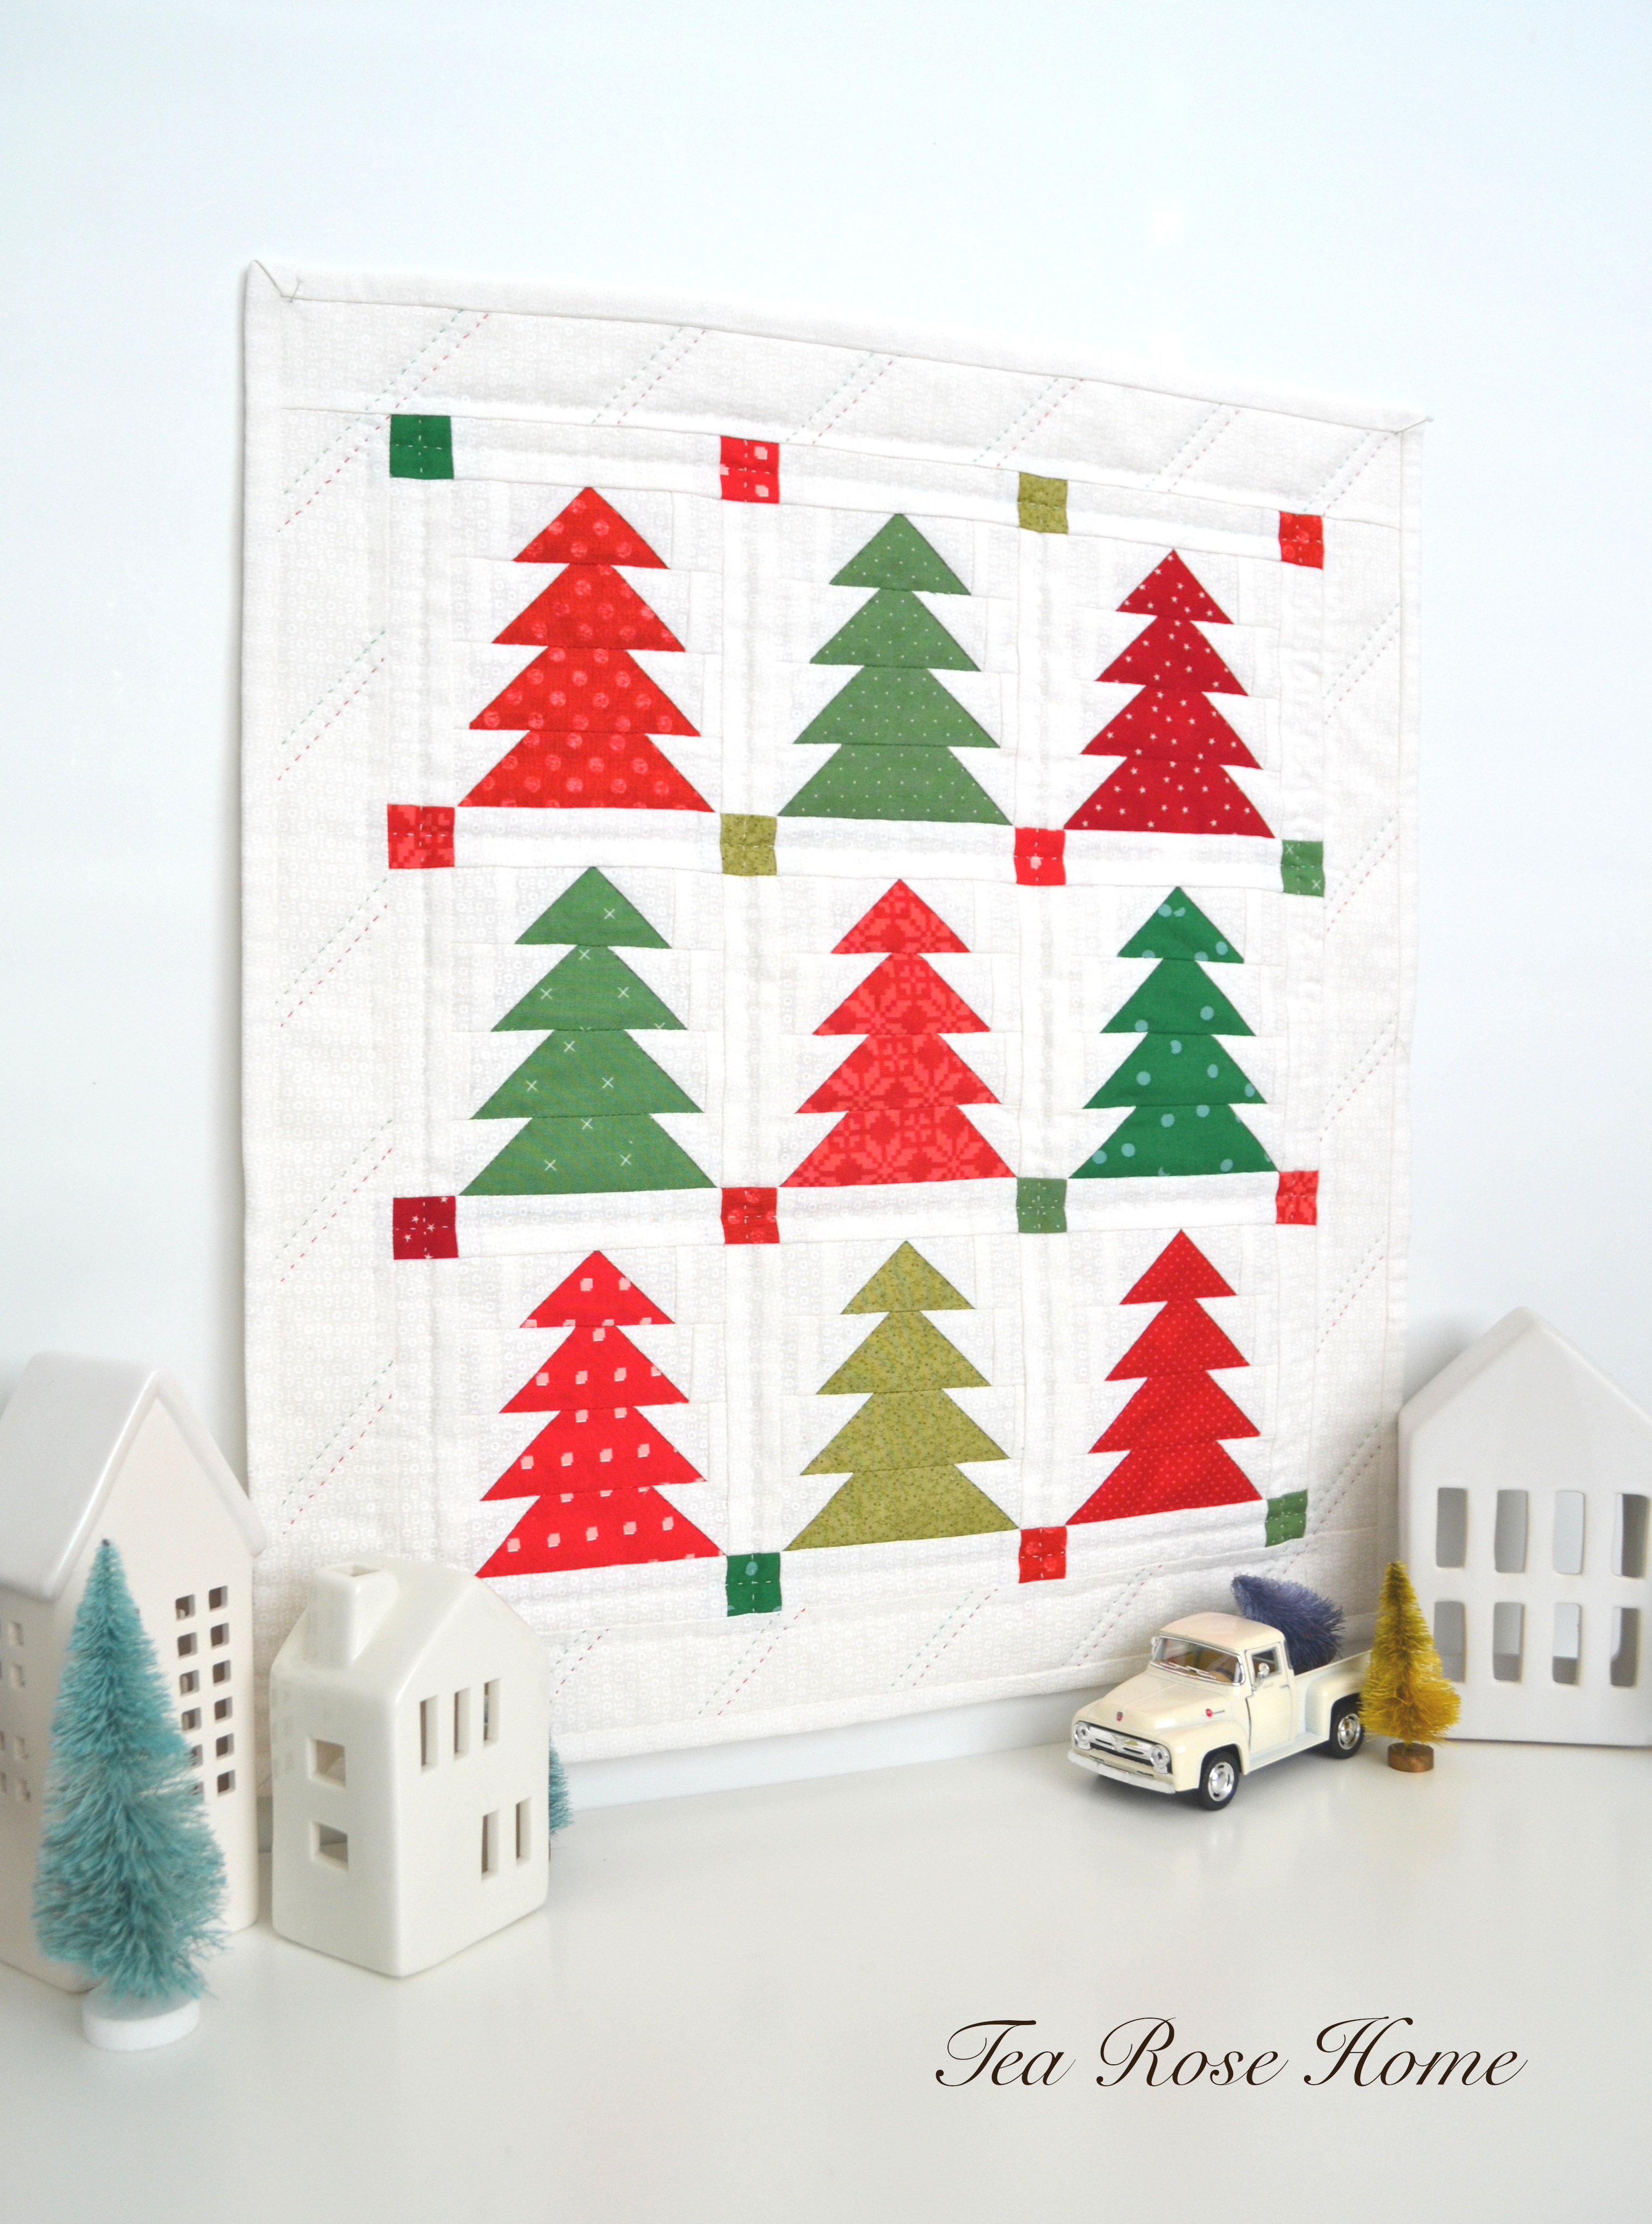
Cutting the fabric might be a little tedious, but once you get the hang of it, this project goes quickly. It is not too late to whip this up to be part of your Christmas decorations.
* YOU NEED
4 different kinds of green fabrics
5 different kinds of red fabrics
White fabric
* HOW TO
1. Cut fabrics. The picture shows the parts you need to construct a block and the measurements are written in the picture. I only listed the measurements on one side because it is symmetrical.


Thursday, June 30, 2022
My Mom's 70th Birthday ~ Purple Quilt


I made the red quilt with only solid fabrics to play with color gradients. For the purple quilt, I thought it would be fun to use prints and make it scrappy. I had most of the fabrics on my shelf, but I added some new ones to them. I used Half Square Triangles to create this quilt and I will show you how to make 8 of them very quickly. There are MANY tutorial posts and videos out there if you want to explore.
* Purple Quilt How to
Finished quilt size 64 1/2" x 80 1/2"
1. Cut 40 pieces of 9 3/4" x 9 3/4" squares from dark fabrics and 40 pieces of 9 3/4" x 9 3/4" squares form light fabrics.


Subscribe to:
Posts
(
Atom
)


I am a Baby Lock Ambassador
